
Check how your Syndra emails are being sent (and why it affects the spam folder)
What it is and why it matters
Every email Syndra sends for you, whether it's a newsletter, an appointment reminder or an invoice, goes out through a sending service. Which service is used, and which domain the email is sent from, affects whether your clients find your email in their inbox or in spam.
Syndra keeps these choices on one screen, Email Services > SMTP Service. The screen says: "You can use your own SMTP services or use the default service." In plain words:
- The default service is the sending service that comes with your Syndra account. It's already selected on a new account, and you don't need to set anything up for it to work. It sends from a shared sending domain.
- Your own service is an email account or mail server you already have. You can add it so Syndra sends through it instead.
- A dedicated sending domain is a sending setup tied to your own business domain. Syndra notes that using one "can help improve deliverability and maintain your sender reputation."
This article shows you how to check which option you're using today. It's look-only and doesn't change anything. Setting up a dedicated sending domain involves changes to your domain's DNS settings and isn't covered here.
What you need before you start
- Access to Settings. If you don't see it, ask your account admin.
- Nothing else. This is a look-only check.
Steps
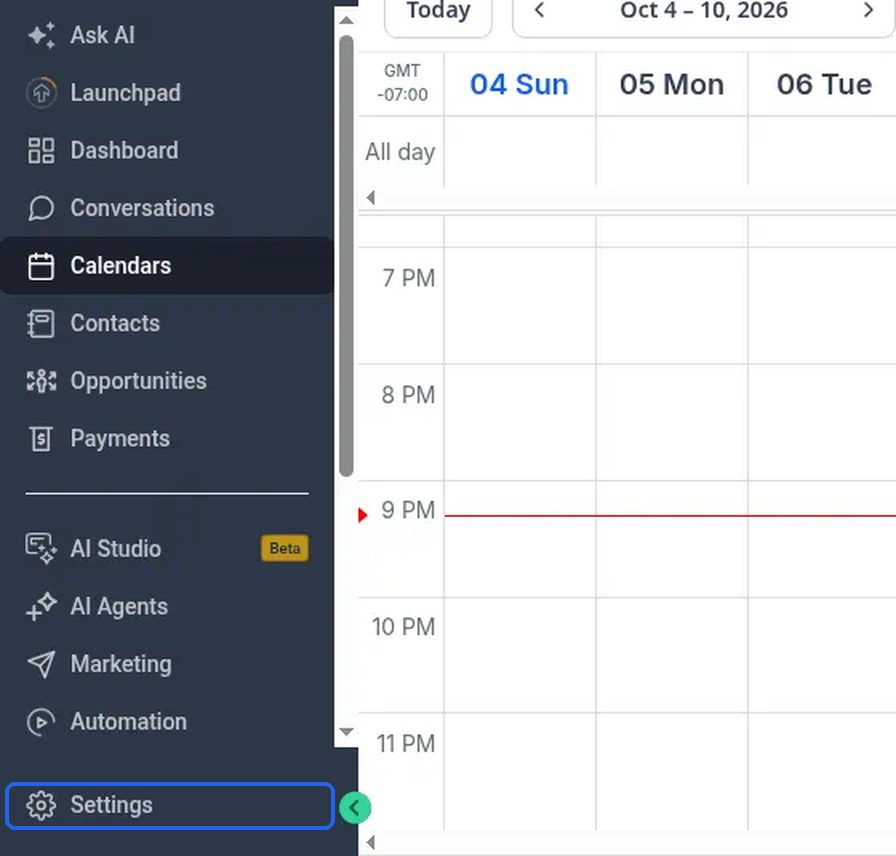
In the left-hand menu, click Settings.
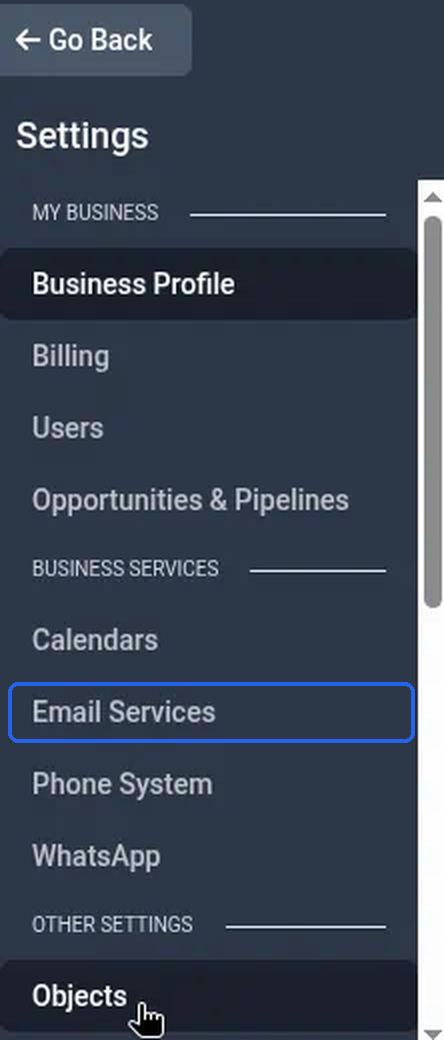
What you should see: the Settings menu, with the headings MY BUSINESS, BUSINESS SERVICES and OTHER SETTINGS.
Under BUSINESS SERVICES, click Email Services.
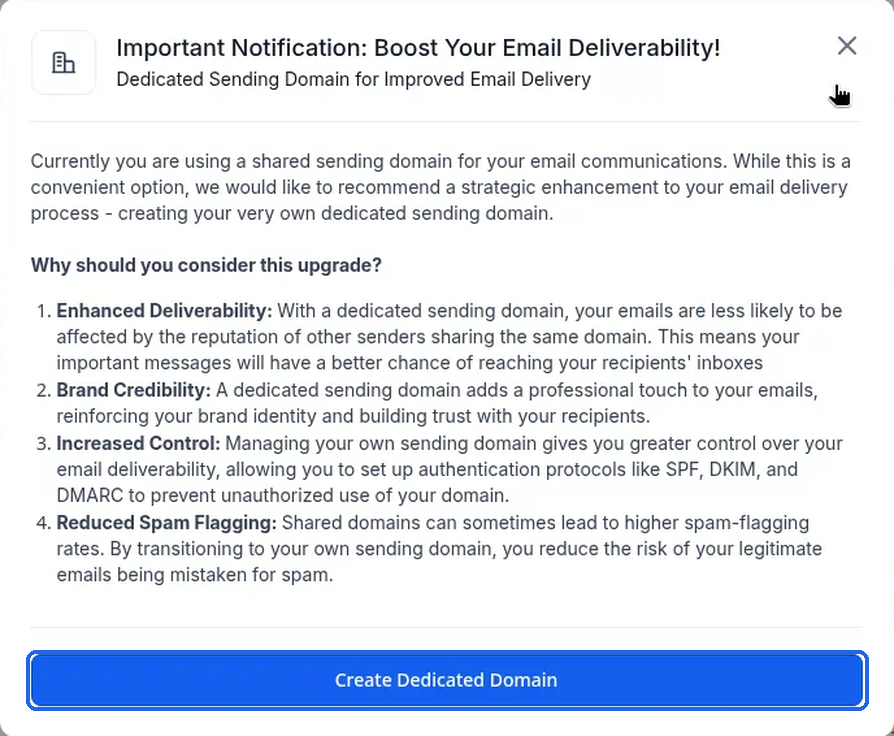
What you might see first:
- On some visits, a short feedback question: "How has your experience been with Email Services?". Answer or close it; it may appear once and not on later visits.
- A modal headed "Important Notification: Boost Your Email Deliverability!" (subtitle about a Dedicated Sending Domain). Body covers Why upgrade with Enhanced Deliverability, Brand Credibility, Increased Control, and Reduced Spam Flagging. Buttons: Create Dedicated Domain and close X. You don't need to act on it now. It can appear on every open; there is no "don't show again" checkbox. Going to View Configuration then Back to SMTP Service returns to SMTP without the modal.
What you should see next: a page titled Email Services with six tabs: SMTP Service, Reply & Forward Settings, Email Analytics, Risk Assessment, Bounce Classification and Postmaster Tools. It opens on SMTP Service.
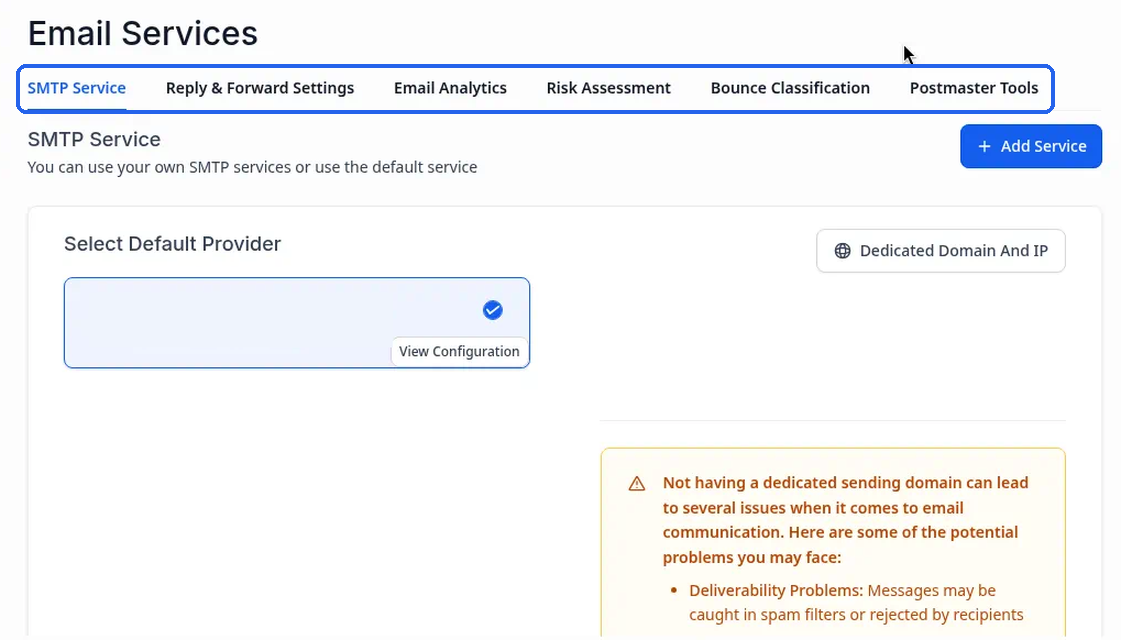
Some details on this screen are hidden in this help image. Under Select Default Provider, find the card with the blue check mark. That's the service your emails go out through right now.
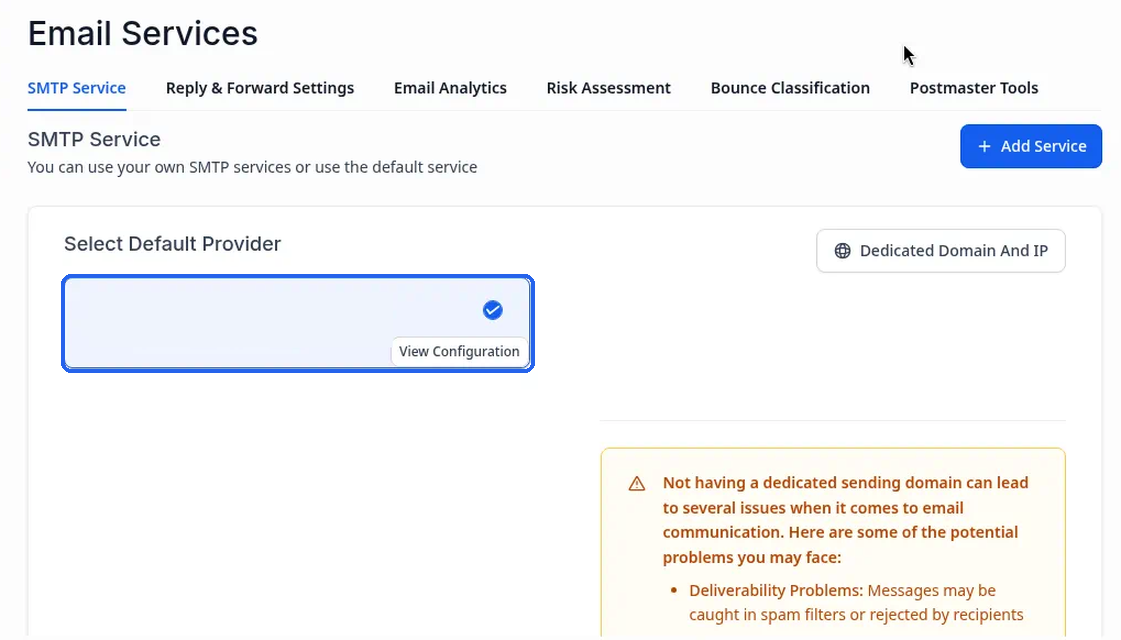
Some details on this screen are hidden in this help image. What you should see: on a new account, there's one card: the default service. It shows the service's name, the domain it sends from underneath, a blue check mark and a View Configuration link. If you see more than one card, the one with the blue check mark is the one in use. Don't click a different card during this check.
Read the domain shown under the service name on the selected card. That's the domain your emails are sent from behind the scenes.
What you should see: on the default service, this is a shared sending domain, not your own business domain. That's normal for a new account. Before you send newsletters to your whole client list, it's worth considering a dedicated sending domain.
Look at the panel on the right side of the screen.
What you should see: left — Select Default Provider card (default selected, with View Configuration). Right — Dedicated Domain And IP panel with an orange warning that starts "Not having a dedicated sending domain…" and four items: Deliverability Problems, Reputation Damage, Limited Control (SPF, DKIM and DMARC), Branding Issues. Click Show More to expand the full text; it becomes Show Less. No new controls appear.
Look at the top right of the page. You'll see + Add Service (to send through your own email account or mail server) and Dedicated Domain And IP (to set up sending on your own domain). Don't click them for this check.
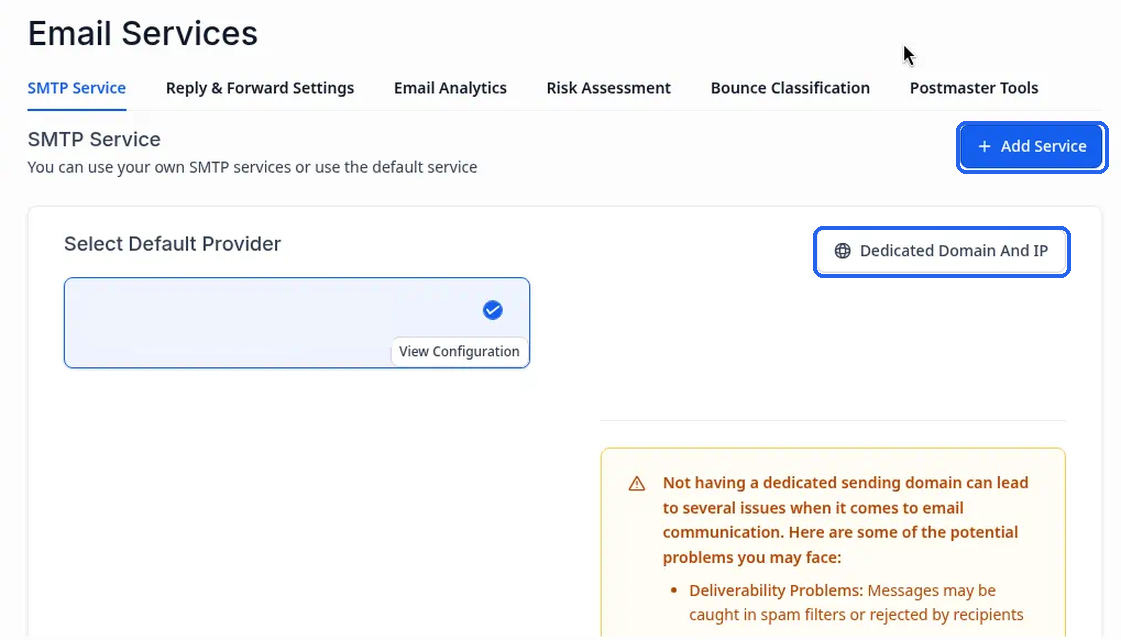
Some details on this screen are hidden in this help image. (Optional) On the default provider card, click View Configuration to see how sending domains are assigned.
What you should see: not a modal — a full page with tabs Dedicated Domain and Domain Configuration, plus Back to SMTP Service. Heading covers Domain Configuration. Fields assign a sending domain per email type: Calendar Domain, Payments, One-One Conversation, Bulk Email, Campaign, Workflow, Client Portal (may show Please Select), and Default Dedicated Domain (greyed when not applicable). Links for Frequency Settings, Manage Campaign and Manage Workflow. A Notification Domain Configuration section includes the Client portal OTP domain. Don't change anything here for this check. Click Back to SMTP Service to return.
If you're not sure your current setup is right for your business, email us (see "Still stuck?" below) with what the selected card shows. We'll help you work out whether anything needs to change.
What success looks like
You now know three things:
- which sending service is selected (the card with the blue check mark),
- which domain it sends from, and
- whether you're on the default service or one your team added.
That's enough to decide whether you need a dedicated sending domain before your next newsletter.
The other tabs on this page
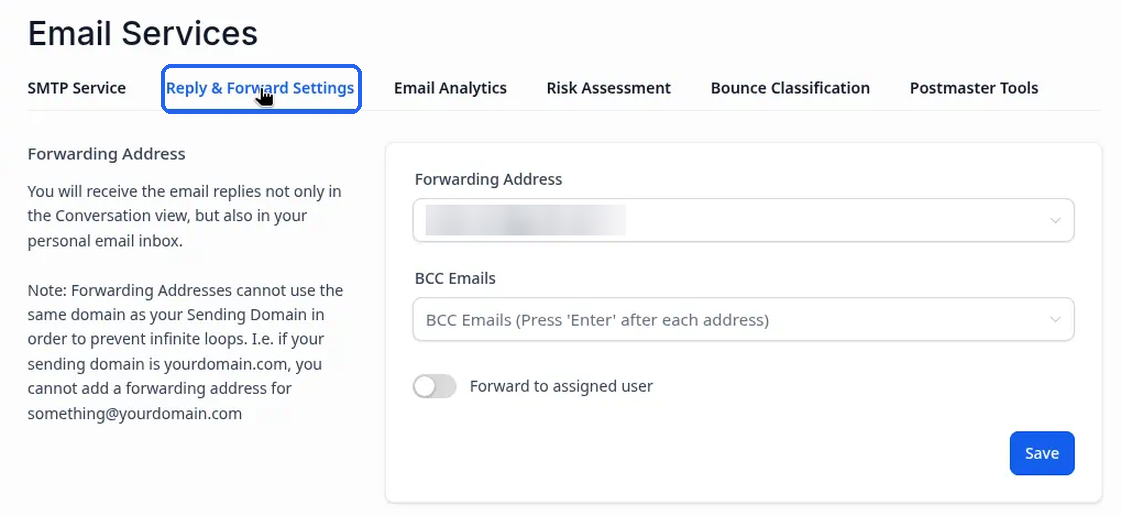
Reply & Forward Settings: where replies to your emails can also be forwarded to your own inbox. It has a Forwarding Address ("You will receive the email replies not only in the Conversation view, but also in your personal email inbox."), BCC Emails, a Forward to assigned user switch, a Save button, and a Reply Address section. A forwarding address can't use the same domain as your sending domain.
- Email Analytics: Email Metrics for a date range, with cards for Sent, Delivered, Opened, Clicked, Complained, Bounced, Unsubscribed and Failed.
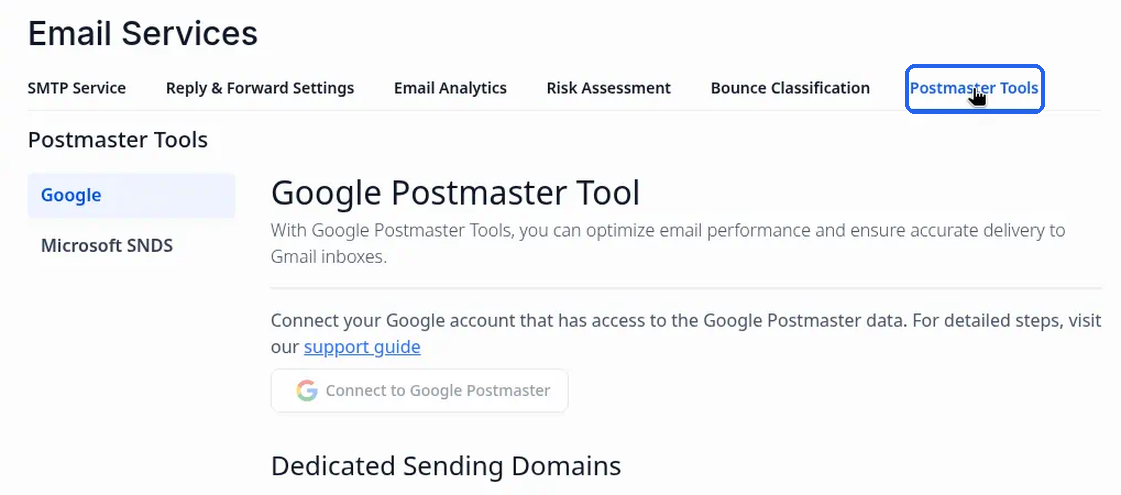
Postmaster Tools: sections for connecting outside sender-reputation tools, including a Connect to Google Postmaster button.
- Risk Assessment: can show 0 records or No Data when nothing is flagged.
- Bounce Classification: counts for Permanent Bounce, ESP/ISP Block and Delivered, with a Delivery Rate, and a Troubleshoot Email Bounces link. When there are no bounces, it shows "No error bounces…".
- Email Analytics tip: the cards can all show 0 if the date range doesn't include the day you sent. The default range may not include today. If the numbers look empty after a send, set the date range by hand so it covers the send day, then click Confirm.
Common mistakes and troubleshooting
Clients say your newsletter went to spam.
This is the most common reason to check this screen. Emails sent on a shared sending domain, or from an address that doesn't match your website domain, may be filtered. Setting up a dedicated sending domain can help. Also ask the client to mark your email as "Not spam" and add your address to their contacts. The Email Analytics tab shows counts for Complained and Bounced, which can help you spot a pattern.
An email "bounced back."
A bounce means the receiving server refused it, most often because the address is mistyped or no longer exists. Check the spelling on the contact's record first. The Bounced count on the Email Analytics tab shows how many emails bounced in the date range.
A pop-up about deliverability keeps appearing.
It's a reminder about dedicated sending domains (Why upgrade benefits listed). Close it with the X (or skip Create Dedicated Domain). It doesn't change your settings. It can return on every reopen; there is no "don't show again" checkbox. Opening View Configuration and using Back to SMTP Service returns to the page without the modal.
You don't see Email Services in Settings.
Your login may not have access. Ask your account admin, or email us.
The name on the default card may not say Syndra.
That's the email delivery service Syndra uses behind the scenes. It's expected, and you don't need to change anything.