
Create a calendar clients can book
What it is and why it matters
A calendar in Syndra is what clients book into. For a grooming or beauty salon, that might be one calendar per groomer or stylist, so clients can pick the person they love, or one calendar that shares bookings across your team. Once a calendar is set up, you can share its booking link on your website, in messages, or on social media, and clients can book themselves in without a phone call.
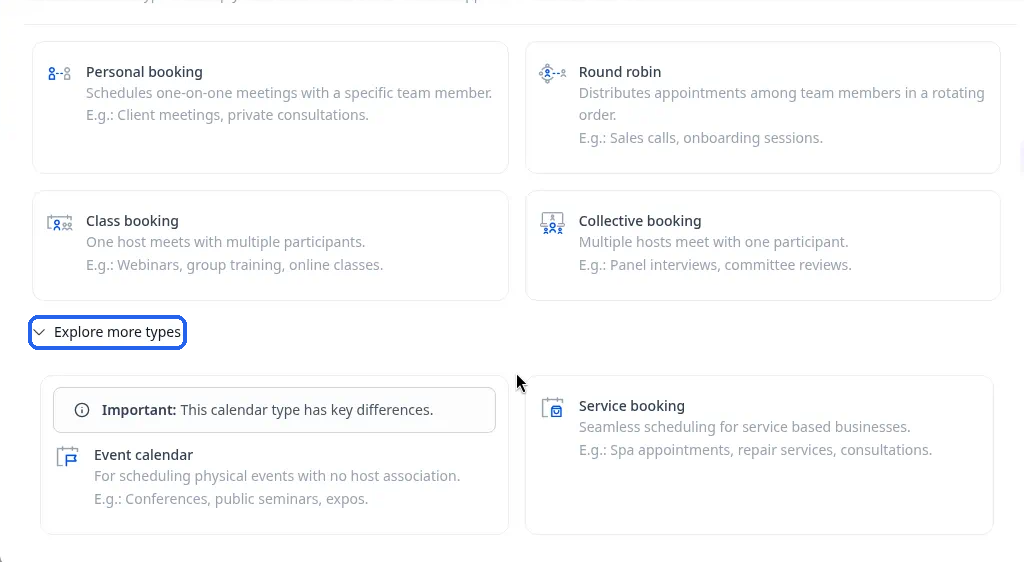
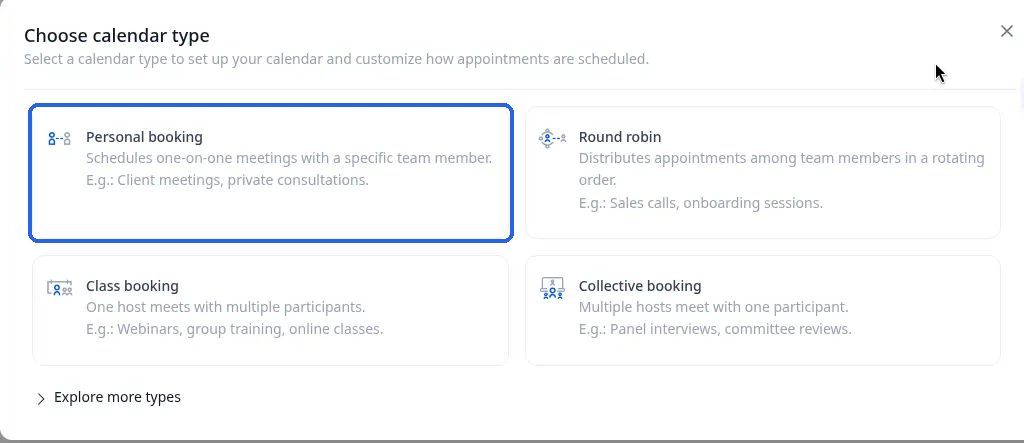
Calendars are managed in Settings > Calendars. When you click + New calendar, you first choose the kind of calendar you want. The four main types are:
- Personal booking: "Schedules one-on-one meetings with a specific team member." This fits a client booking a specific groomer or stylist.
- Round robin: "Distributes appointments among team members in a rotating order." This fits spreading bookings across your team when the client doesn't mind who they see.
- Class booking: "One host meets with multiple participants." This fits something like a group puppy class or a workshop.
- Collective booking: "Multiple hosts meet with one participant." This fits a service that needs two of your team at once.
Explore more types shows two more:
- Event calendar: "For scheduling physical events with no host association." It's marked "Important: This calendar type has key differences."
- Service booking: "Seamless scheduling for service based businesses." The on-screen examples are spa appointments, repair services and consultations.
This article walks through Personal booking, the most common choice for a client booking one groomer or stylist.
What you need before you start
- Access to Settings > Calendars. If you don't see it, ask your account admin.
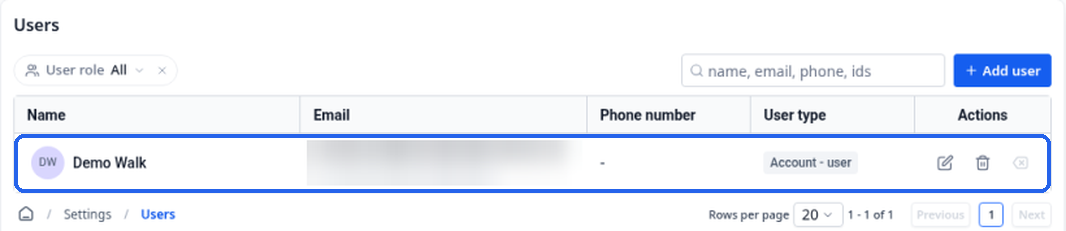
At least one team member added in Settings > Users. Every Personal booking calendar needs a team member, even one that's just for you. If the person isn't in Settings > Users yet, add them first.
- Your service details to hand: the name of the service and how long it takes.
Steps
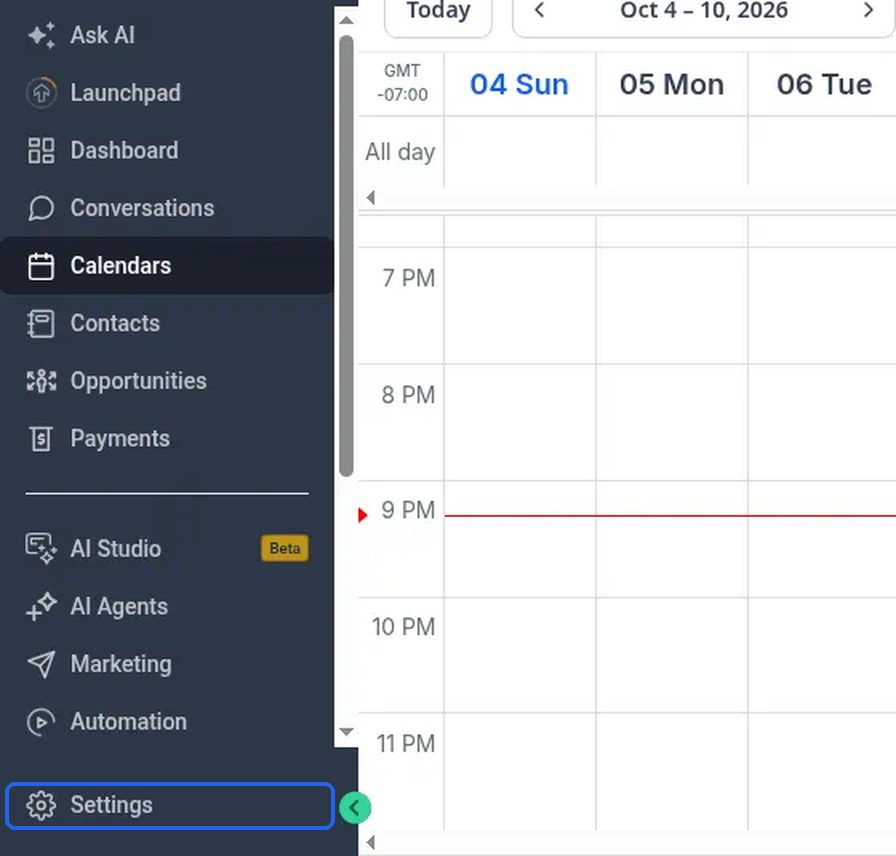
In the left-hand menu, click Settings.
Under BUSINESS SERVICES, click Calendars.
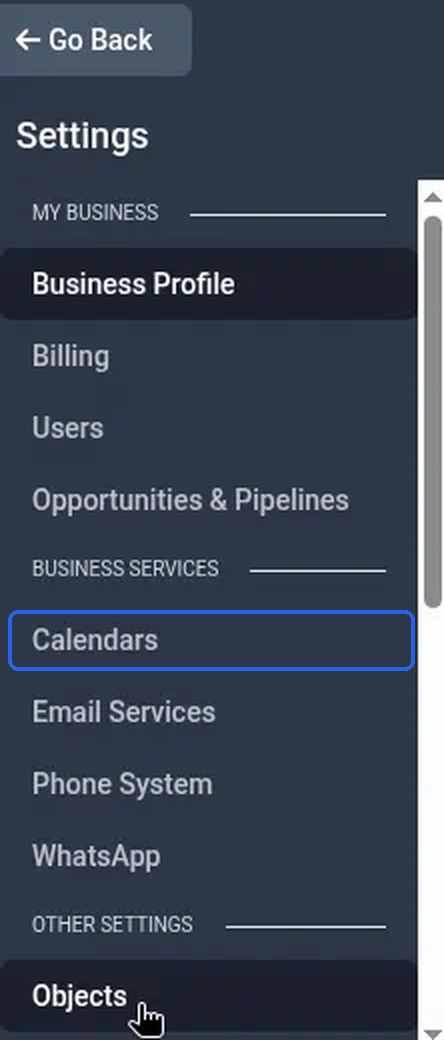
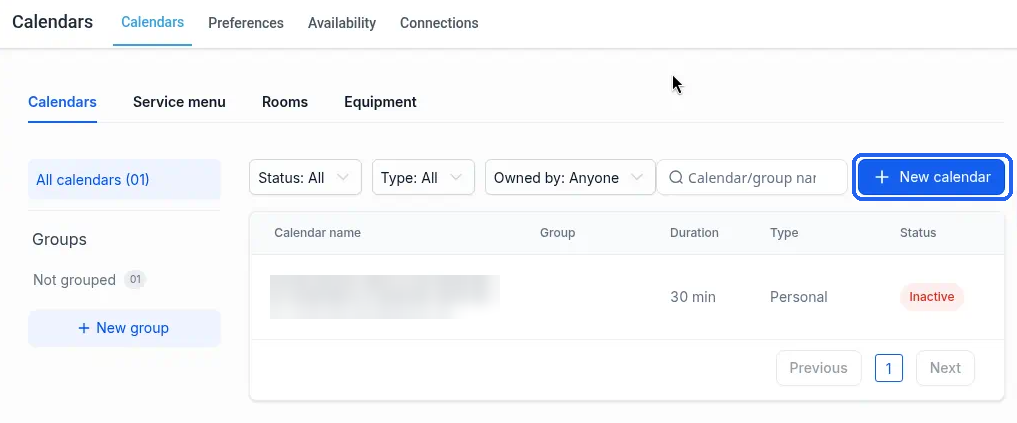
What you should see: the Calendars page, with the tabs Calendars, Preferences, Availability and Connections across the top.
Make sure you're on the Calendars tab, and on the Calendars sub-tab under it (next to Service menu, Rooms and Equipment).
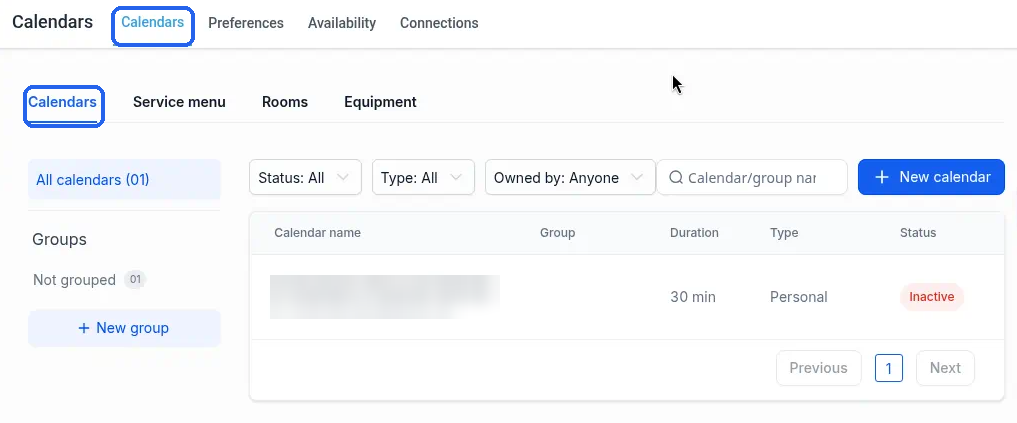
What you should see: your list of calendars, with Status, Type and Owned by filters, a Calendar/group name search box, and the columns Calendar name, Group, Duration, Type and Status.
Click + New calendar (the blue button at the top right of the list).
What you should see: the Choose calendar type window, with the four main types and Explore more types.
Click Personal booking.
What you should see: a New calendar form opens. Nothing is created yet. The calendar is only made when you click Confirm in step 11.
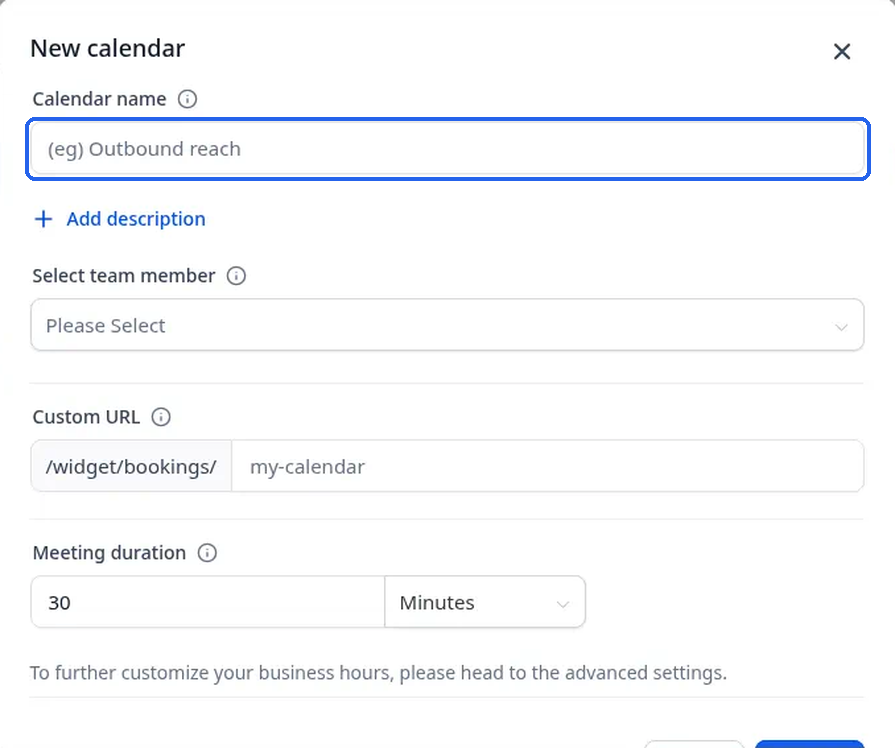
In Calendar name, type a name clients will understand, for example "Full Groom with Maria". This box is required.
(Optional) To add a short description, click + Add description and type it in the Description box that appears. To take it away again, click Remove description.
Click Select team member and choose the person clients will book with. This is required.
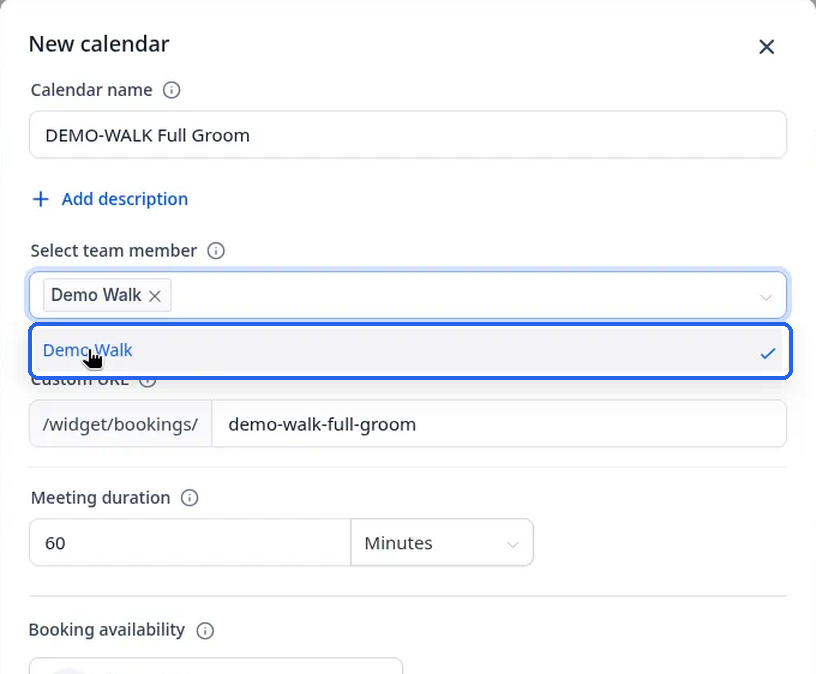
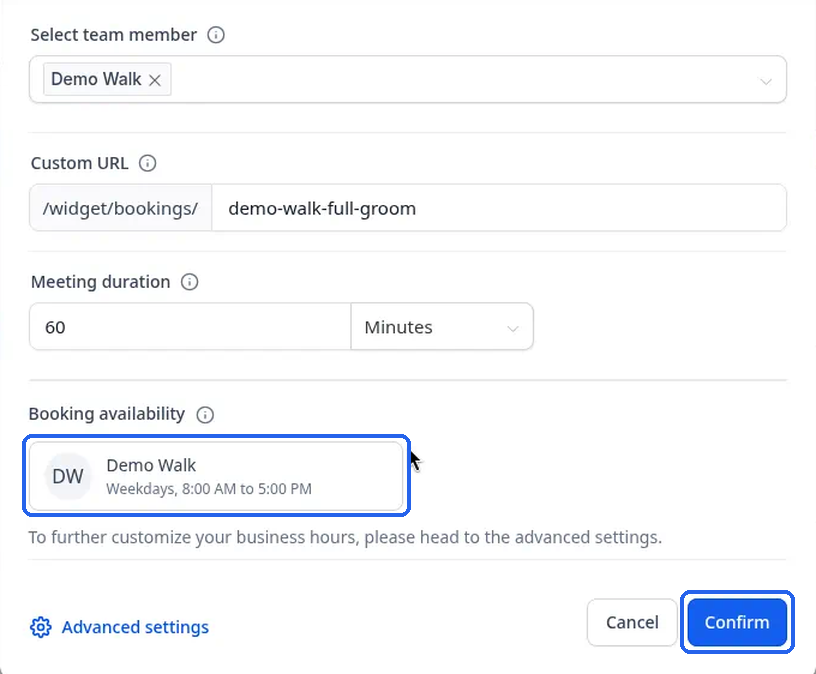
What you should see: the person's name in the box, and a Booking availability card underneath showing their hours (for example "Weekdays, 8:00 AM to 5:00 PM").
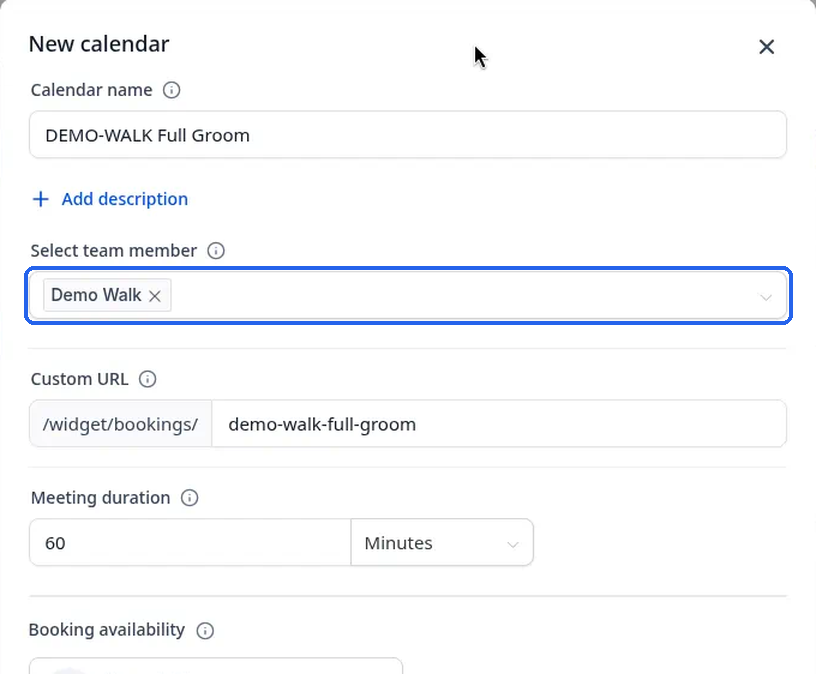
Check Custom URL. Syndra fills it in for you from the calendar name (for example
full-groom-with-maria). This becomes the end of your booking link. You can change it if you want something shorter.In Meeting duration, set how long the appointment lasts. It starts at 30 Minutes. For a one-hour groom, change it to 60.
Under the fields you'll see: "To further customize your business hours, please head to the advanced settings." You don't need to do this now. See "Changing more settings" below.
Click Confirm.
What you should see: a Success window saying "You have successfully configured your personal/team calendar". It shows the calendar's booking link (with Copy) and embed code (with Copy), plus the buttons Close and Preview booking widget.
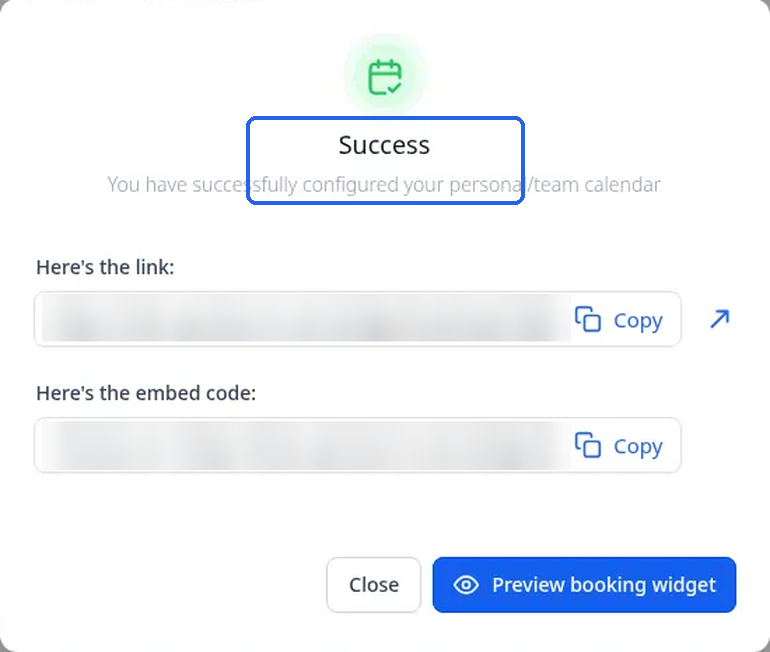
Click Close.
Changing more settings (optional)
On the New calendar form, the Advanced settings button opens the full calendar editor. You can open the same editor later with the Edit calendar (pencil) icon on the calendar's row. In the editor, click Save changes at the top right to keep your changes, or Back to calendars list to leave.
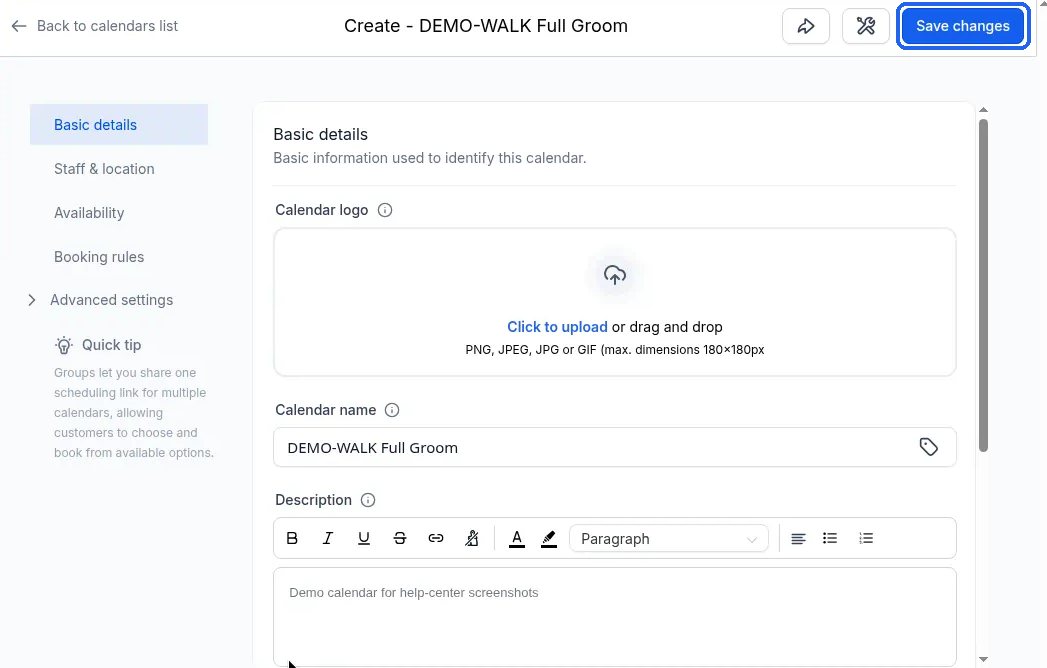
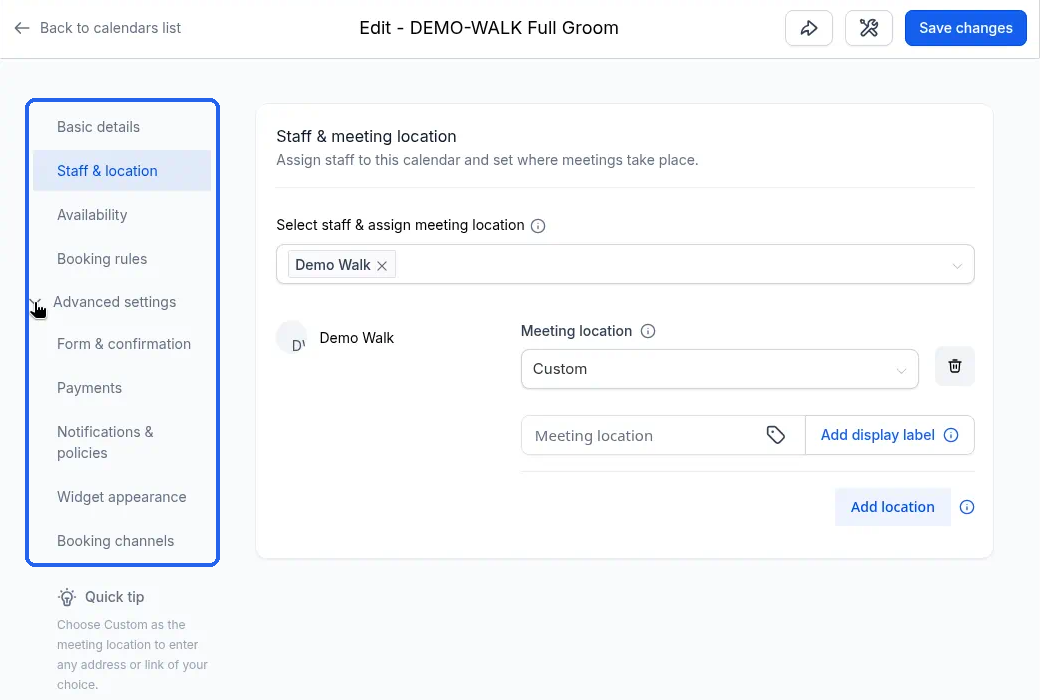
The editor has these sections (left menu). Basic details, Staff & location, Availability and Booking rules are covered above. Under Advanced settings the other sections are:
- Form & confirmation (on screen: Forms & guests): the default form; the order of the booking steps (Step 1 Date & Time, then Step 2 Form); Sticky contacts Pre-populate (off in our example); Consent checkbox (on, text editable — standard "I confirm that I want to receive content from this company using any contact information I provide."); Add guests (off); Confirmation page set to Thank you message (the other choice is Redirect URL), with the default thank-you text, which asks the client to wait for you to confirm and gives your business phone number; Meta pixel empty; Auto-confirm (on in our example). The calendar editor has no tab named Additional options.
- Payments: Accept payments (off in our example). When no payment company is connected, the screen says "No payment provider connected". There is no price field on this calendar.
Notifications & policies: six notification types — Appointment booked (Unconfirmed), Appointment booked (Confirmed), Cancellation, Reschedule, Reminder and Follow-Up — each with Email, In-app, SMS and WhatsApp channels. On a new calendar in our example, the defaults were:
Notification Email In-app SMS WhatsApp Appointment booked (Unconfirmed) Disabled Enabled (for Assigned User) Disabled not connected Appointment booked (Confirmed) Disabled Enabled (for Assigned User) Disabled not connected Cancellation Disabled Disabled (Send to empty) Disabled not connected Reschedule Disabled Disabled Disabled not connected Reminder Disabled Disabled; trigger 10 Minutes before Disabled not connected Follow-Up Disabled Disabled; trigger 1 Hours after end Disabled not connected When Email is Disabled, its "Who should receive" checkboxes (Contact, Assigned user, Additional emails) still show as checked but greyed out — same pattern on every notification. SMS is the same pattern (Contact, Assigned User, Additional Phone Numbers, all checked when Disabled). WhatsApp tabs show a Connect WhatsApp button. Also: Assign contacts to calendar team members (off); Allow rescheduling and Allow cancellation (both on, with blank expiry Minutes); a third-party setting that lets Google/Outlook/iCloud send invitation and update emails (on in our example), with meeting-invite notes that can include phone/email and reschedule text.
Texting is available on eligible plans and only for clients who've agreed to get texts from your business.
- Widget appearance: template Neo selected in our example (the other choice is Classic); a primary colour (blue in our example); the button label "Schedule Meeting" in the editor (the live public widget shows "Schedule meeting" with a lowercase m); the title, description and details all switched on; Reset, Preview and Insert custom code (empty at the bottom in our example).
- Booking channels: Client portal booking (off in our example).
What success looks like
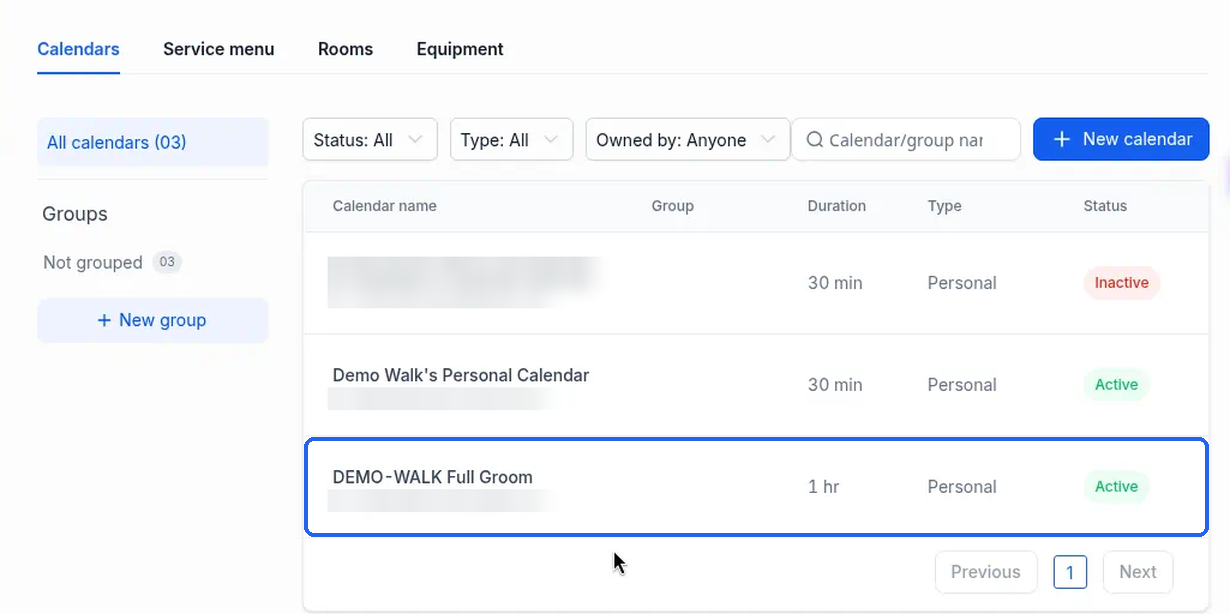
After you click Close, your new calendar is in the list on the Calendars tab, showing its name, its duration (for example "1 hr"), the type Personal and the status Active.
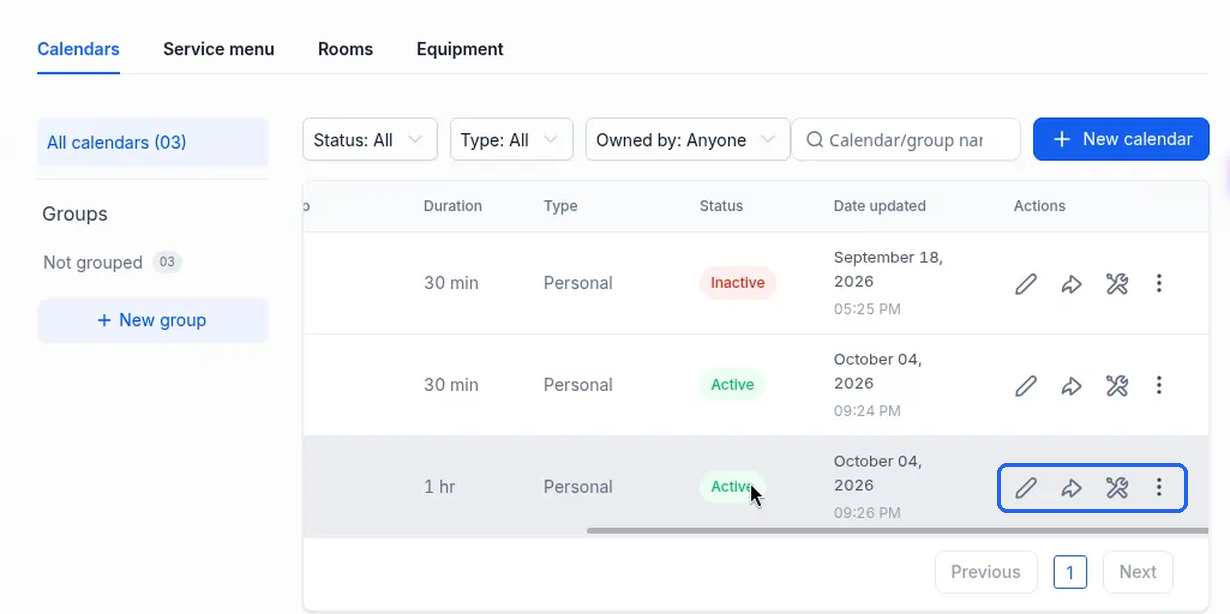
Scroll the table to the right to see the row's icons, from left to right: Edit calendar, Share calendar, Troubleshoot calendar and More options.
Next, get the link clients use to book: see Get your booking link and share it with clients.
Common mistakes and troubleshooting
You see "At least one team member is required."
You clicked Confirm (or Save changes) without choosing a team member. Click Select team member, choose someone, and try again. If the list says "No Data", nobody has been added in Settings > Users yet. Add the team member first.
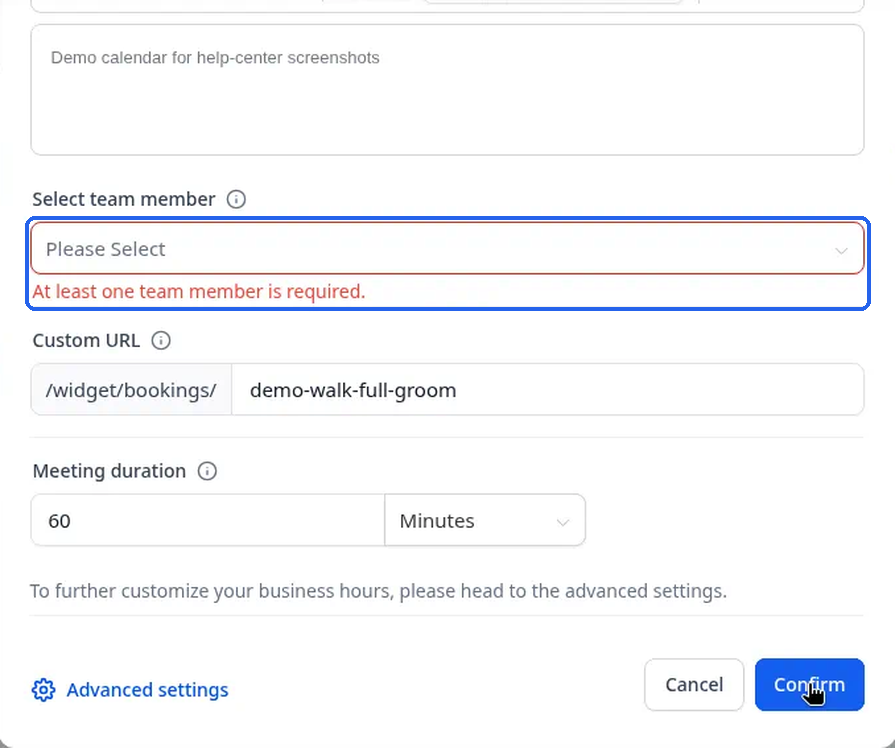
You see "Please enter a name."
The Calendar name box is empty. Type a name and click Confirm again.
You picked the wrong calendar type.
If you don't see a way to change a calendar's type after it's created, create a new calendar with the type you want instead. If a client should always see the same person, choose Personal booking. If any available team member will do, Round robin shares bookings in turn.
There's a calendar in the list you didn't make, named after a team member.
When you add a team member, Syndra creates a personal calendar for them automatically, named "<their name>'s Personal Calendar" (30 minutes). You can leave it or edit it.
A calendar suddenly shows as Inactive.
If a calendar's only team member is removed, the calendar becomes Inactive. Open it with Edit calendar, choose a team member, then open the row's More options (⋮) menu and click Activate calendar. When Active, the same menu shows Deactivate calendar. A confirmation window asks "Activate this calendar?" (or "Deactivate this calendar?"), says "You're about to … calendar.", and has Cancel and Save buttons.
You can't find your calendar in the list.
Check the Status, Type and Owned by filters at the top of the list and set them back to show everything. You can also search in the Calendar/group name box.
You can't find where to add a calendar.
Add new calendars in Settings > Calendars, using + New calendar on the Calendars tab. The Calendars item in the main left-hand menu is where you see your appointments (Calendar view and Appointment list view). The + New button on its Calendar view tab opens the Book appointment window for booking a client, not a new calendar.