
Get your booking link and share it with clients
What it is and why it matters
Your booking link is the web address clients use to book an appointment on one of your Syndra calendars. Put it on your website's "Book now" button, in your social media bio, or at the end of a text to a regular client, and clients can book themselves in at any hour instead of calling during a busy grooming or color session. Texting is available on eligible plans and only for clients who've agreed to get texts from your business.
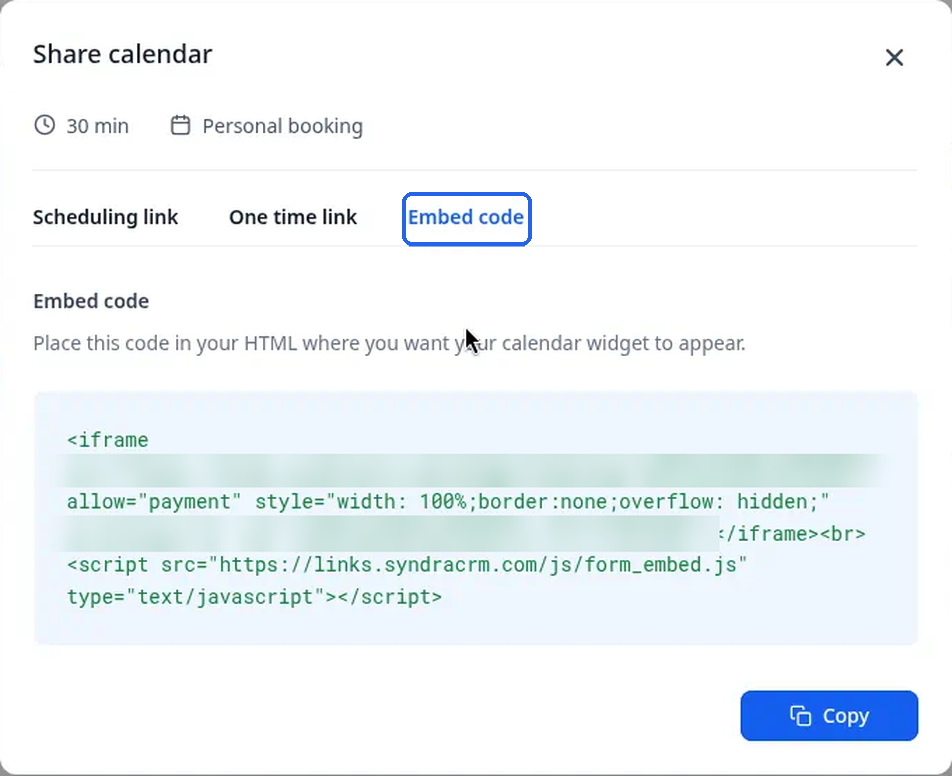
Every calendar has a Share calendar window with three tabs: Scheduling link, One time link, and Embed code. This article focuses on the two links on the Scheduling link tab, and briefly explains the other two tabs:
- Scheduling link: the everyday booking address. It's built from the calendar's slug (the short name at the end of the address). The window explains: "The scheduling link is determined by the slug. Adjust the slug, and the scheduling link automatically adapts to the modification."
- Permanent link: an address that never changes, even if you change the slug later. The window describes it as "Ideal for funnels, website redirects, or ads".
If you're putting the link somewhere that's hard to update, like a printed card, a paid ad, or your website, the Permanent link is the safer choice.
What you need before you start
- A calendar that's already set up and Active. If you haven't made one yet, start with Create a calendar clients can book.
- Access to Settings > Calendars. If you don't see it, ask your account admin.
Steps
In the left-hand menu, click Settings.
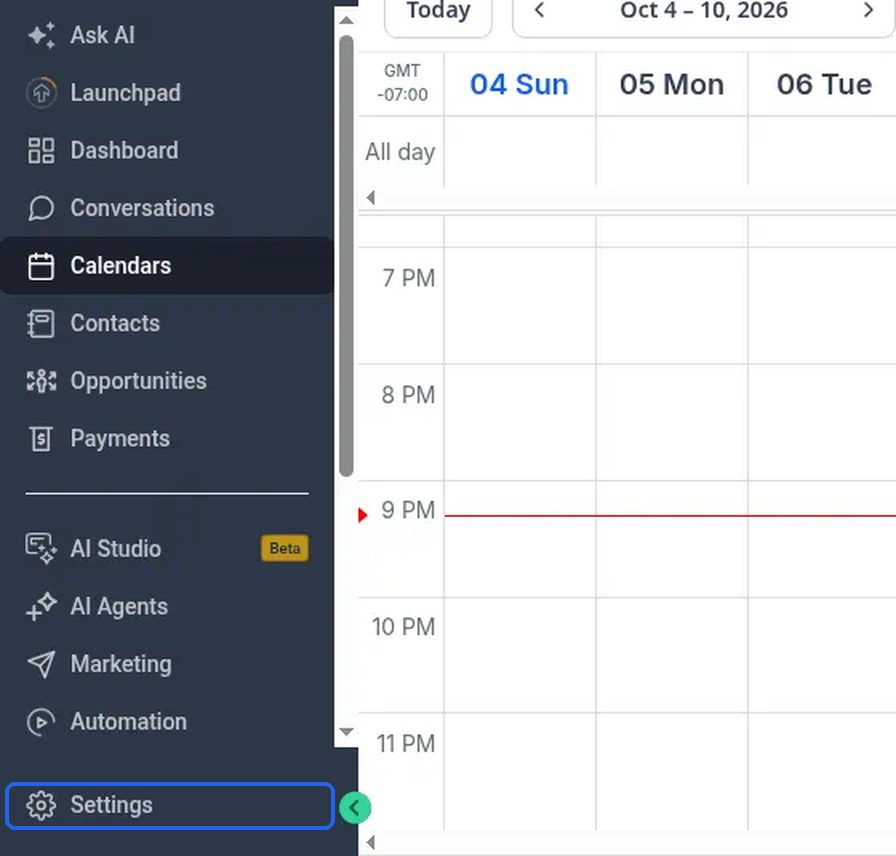
What you should see: the Settings menu opens, with headings such as MY BUSINESS and BUSINESS SERVICES.
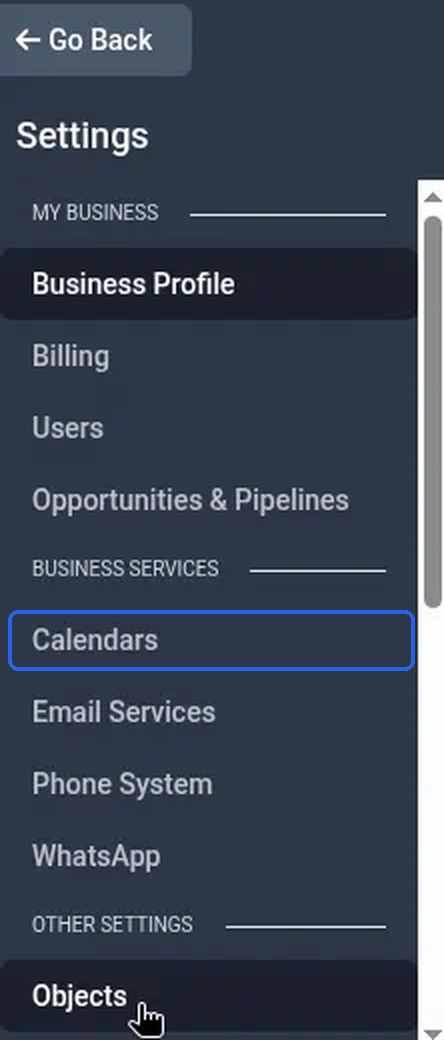
Under BUSINESS SERVICES, click Calendars.
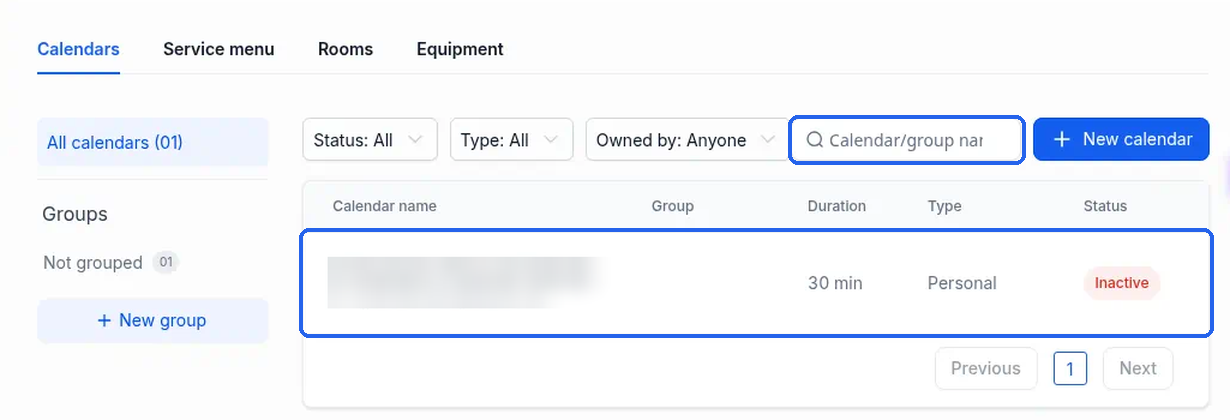
What you should see: the Calendars page, with the tabs Calendars, Preferences, Availability and Connections. It opens on the Calendars tab, showing your list of calendars.
Find the calendar you want to share in the list. If you have lots of calendars, type part of its name in the Calendar/group name search box.
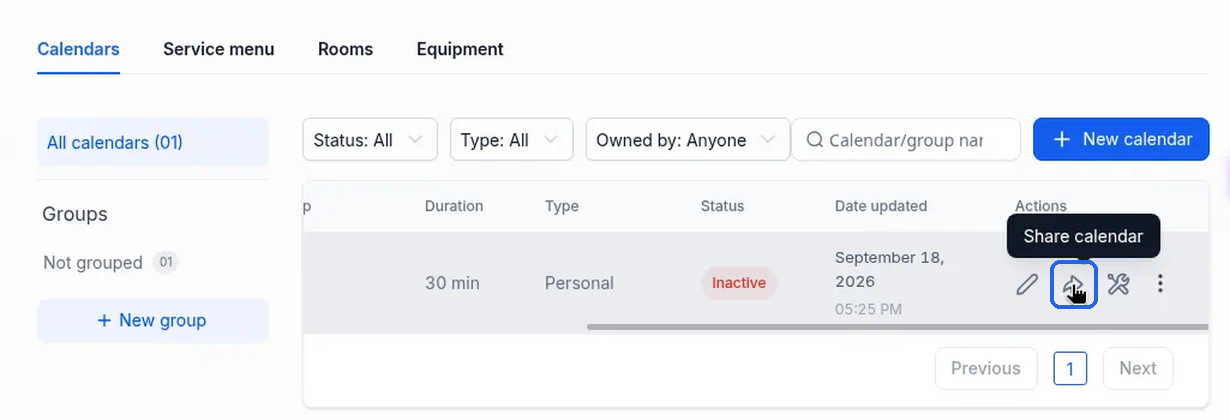
On that calendar's row, click the Share calendar icon. The row icons are in the Actions column at the far right. From left to right they are Edit calendar (pencil), Share calendar (arrow), Troubleshoot calendar (tools) and More options (three dots). If you don't see the icons, scroll the table to the right. Hover over an icon to see its name.
What you should see: the Share calendar window opens.
Stay on the Scheduling link tab. At the top of the window you'll see the calendar's length and type (for example "30 min" and "Personal booking").
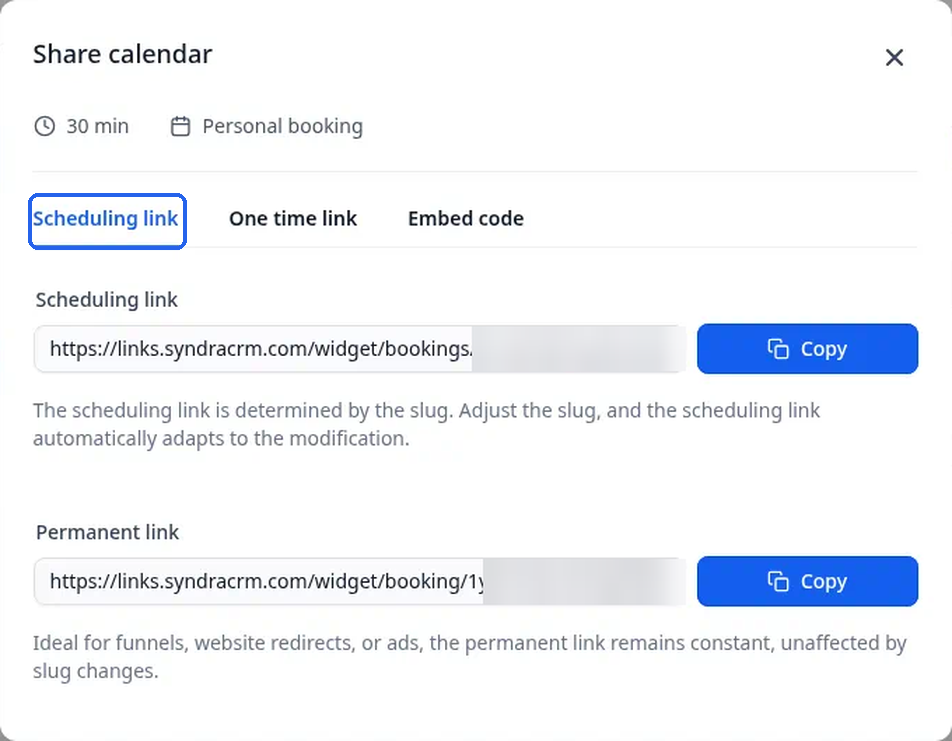
What you should see: two links, Scheduling link and Permanent link, each with a Copy button and a short explanation underneath.
Decide which link you need: the Scheduling link for everyday sharing, or the Permanent link for your website, ads, or anything printed.
Click Copy next to the link you chose.
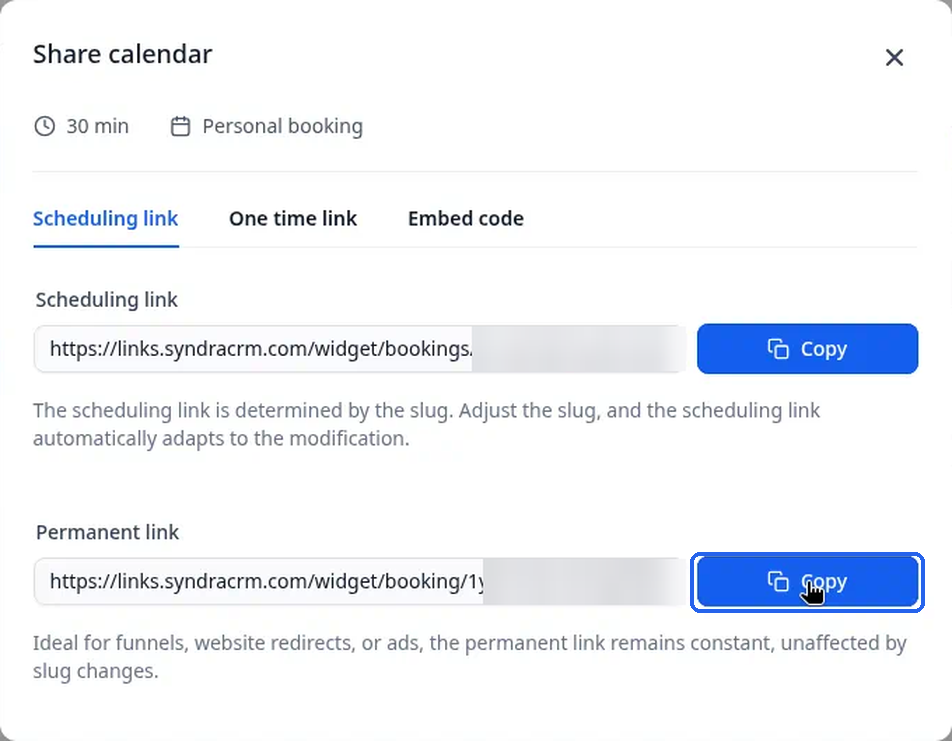
What you should see: nothing changes on screen. There's no "Copied" message, but the link is now copied. Paste it somewhere to check.
Paste the link where you want clients to find it: your website's booking button, a message to a client, or your social media profile.
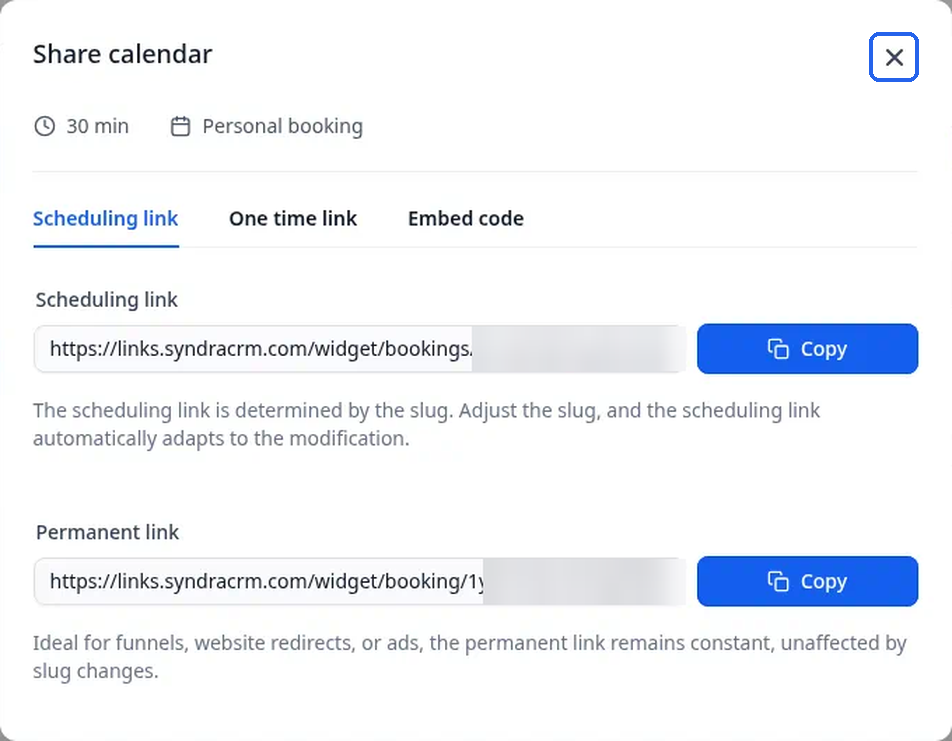
Click the X at the top right of the window to close it.
The other two tabs
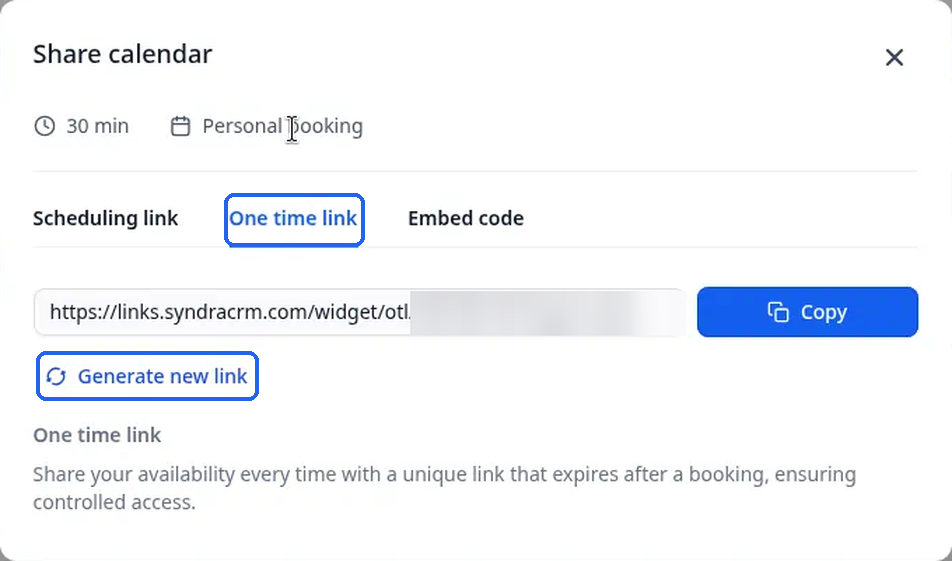
One time link gives you a single link that expires after one booking. The window says: "Share your availability every time with a unique link that expires after a booking, ensuring controlled access." It has a Copy button and a Generate new link option.
Embed code gives you a block of code that puts the booking calendar right on a web page. The window says: "Place this code in your HTML where you want your calendar widget to appear." Click Copy — you should see "Copied to clipboard" — then paste the code into your website where you want the calendar to show.
Clicking Generate new link replaces the one-time link with a new address (the end of the link changes). While it's generating, the control looks greyed out; then the new link appears. No message is shown. Click Copy again after regenerating.
What success looks like
Open the link you copied in a new browser tab. You should see your calendar's booking page:
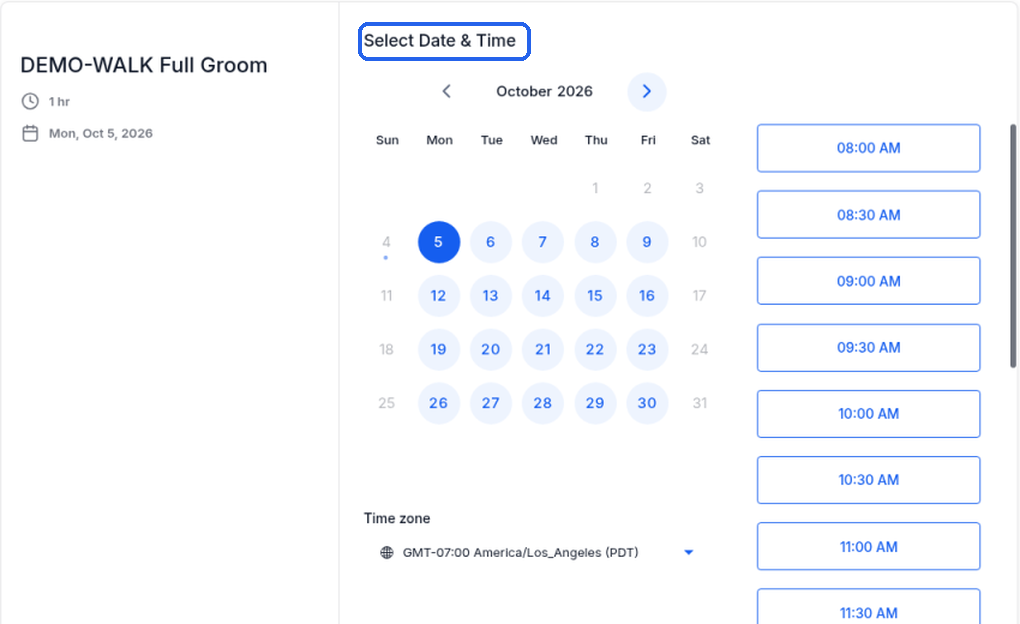
On the left are the calendar's name, how long the appointment lasts (for example "1 hr") and the chosen date. In the middle is a Select Date & Time month calendar, with available days marked, then a Time zone line with a dropdown. The list of available start times is on the right. This is what your clients see.
Start times can be closer together than the appointment length. For example, a 1-hour appointment can offer times every 30 minutes. That spacing comes from the calendar's booking rules.
After a client books
Clients pick a date and time, click Select, then fill in the "Enter details" form. There is no confirmation preview before submit — the thank-you (success) page appears only after a successful booking.
Clients do not choose or add a location while booking. There is no location field, Add location button or multi-location choice on the date & time step, after Select, or on Enter details. The meeting location appears as a read-only field on the success page only — for example a Custom URL such as https://example.com/demo-meet that you set under Edit calendar > Staff & location. Add location is only on that Staff & location screen in your calendar settings, not on the public widget.
Form before submit (required fields marked with *): First name*, Last name*, Phone* (with a US flag and +1), Email*. Additional information is optional. The consent checkbox has no asterisk, starts unchecked, and is still required when Consent is on — the label reads "I confirm that I want to receive content from this company using any contact information I provide." Submitting without ticking it shows "Please accept the terms and conditions". Phone numbers must be a valid format — for example (201) 555-0123 and (201) 555-0199 are accepted; a number like 555-010-0199 is rejected as invalid; the field's placeholder is (201) 555-0123. The submit button on the live page is "Schedule meeting" (lowercase m). Additional options and Insert custom code don't appear on the public form.
When a client finishes the form and clicks Schedule meeting, they see a success page. For example, for a 1-hour booking:
- Heading: "Your meeting has been scheduled"
- Message: the thank-you text set on the calendar. The default asks the client to wait for you to confirm and gives your business phone number. You can change this text under Form & confirmation.
- Summary: the appointment length and time (for example 1 hr, 02:00 PM - 03:00 PM), the date, the calendar's meeting location (the Location field shows whatever you set under Meeting location — for example the Custom URL placeholder https://example.com/demo-meet), and the time zone (for example America/Los_Angeles (PDT))
- Buttons to add the appointment to Google Calendar, Outlook Calendar and iCloud Calendar
- No payment step and no captcha on this calendar
To change what clients see on the form and the success page, go to Settings > Calendars, click Edit calendar (the pencil) on the calendar's row, and open Advanced settings. The form and success page are under Form & confirmation (on screen: Forms & guests); colours and layout are under Widget appearance. For the full list of these settings, see Create a calendar clients can book.
Common mistakes and troubleshooting
A link you shared a while ago stopped working.
If someone changed the calendar's Custom URL (slug), the Scheduling link changes with it: the old link stops working and only the new one works. The Permanent link and website embeds that use the permanent ID stay the same. Use the Permanent link anywhere that's hard to update.
You clicked Copy and nothing happened.
That's normal: there's no on-screen message. Paste the link to check it copied.
The link opens a "404 Page Not Found" page.
Check that the calendar is Active in the calendar list, and that you copied the whole link.
You copied the wrong calendar's link.
Close the window, check the calendar name on the row, and open Share calendar on the right one.
You can't see the Share calendar icon.
Scroll the calendar table to the right. The icons are in the last column.
The link opens but a client can't find a time.
The calendar may not have any hours open on the days they're looking at — or a start may already be taken (the Troubleshooting view marks it SLOTMAX or BLOCKED, and nearby times may show DURATION). To check, open Troubleshoot calendar (the tools icon) on the calendar's row, or look at the calendar's hours in the Availability section under Edit calendar.
The form won't submit and says "Please accept the terms and conditions".
The consent checkbox is required even when it has no asterisk (and it starts unchecked). Tick it, then click Schedule meeting again.
The phone number is rejected.
Use a full local-style US number (for example the placeholder (201) 555-0123, which is accepted). A number like 555-010-0199 is rejected as invalid.
You expected a thank-you preview before booking.
There isn't one on this widget — the confirmation (thank-you) page shows only after a successful Schedule meeting.
Clients ask how to pick a location when booking.
On this calendar's public widget they can't — you set the location under Edit calendar > Staff & location, and they only see it as a read-only link after booking succeeds. Add location (for multiple options) is only on that settings screen.