
Edit a website page and preview your changes
What it is and why it matters
Your website is often the first thing a new client sees before they book a groom, a cut or a color. Prices change, you add a new service, a groomer joins the team, or you want a fresh photo of your salon. Keeping your site up to date means clients see the right information, and fewer people call to ask questions your site could have answered.
In Syndra, your website lives under Sites on the Websites tab. Each website is made of pages (for example Home, Services or FAQ). You open a page in the page builder, make your changes, save them, and check them in preview.
This article takes you from the Syndra menu through editing a page, saving it and previewing it. It stops just before Publish. Publishing your changes will be covered in a separate article (see What happens next at the end).
What you need before you start
- A website in your Syndra account with at least one page. This article is about editing a site that already exists. If your Websites list is empty, email us before creating a new one. A brand-new blank website starts with 0 pages, so there's nothing to edit until a page is added.
- Access to Sites. If you don't see it, ask your account admin.
- Your new wording ready. Have your updated text written before you start.
- A few minutes on a computer. The page builder has a lot of tools across the top of the screen, and they're easiest to use on a computer.
Steps
In the left-hand menu, click Sites.
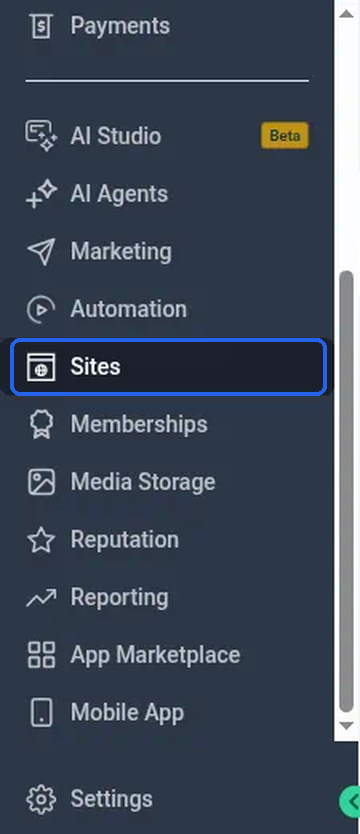
What you should see: the Sites area opens, with a row of tabs across the top. It may open on the Funnels tab first. That's expected. Your website is on the Websites tab.
Click the Websites tab.
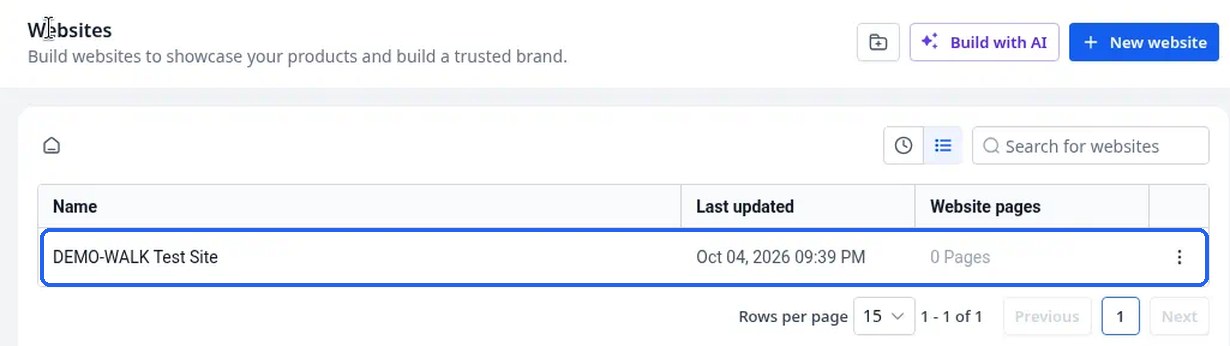
What you should see: a list of your websites, with the columns Name, Last updated and Website pages.
Click your website's name.
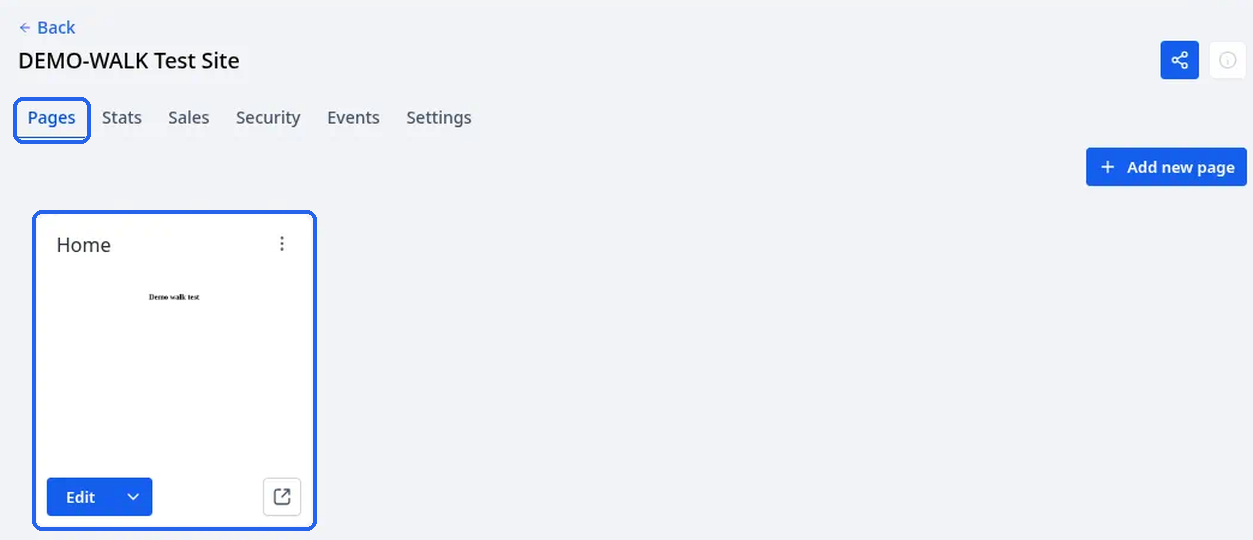
What you should see: the website opens on the Pages tab, with a card for each page. (For more on this screen, see Find your website in Syndra and see all of its pages.)
On the card for the page you want to change, click Edit. Click the word Edit itself, not the small arrow next to it or the square icon at the bottom right of the card. Those do different things. (The small arrow opens a short menu with Edit page details, Edit in a New Tab and Publish page.)
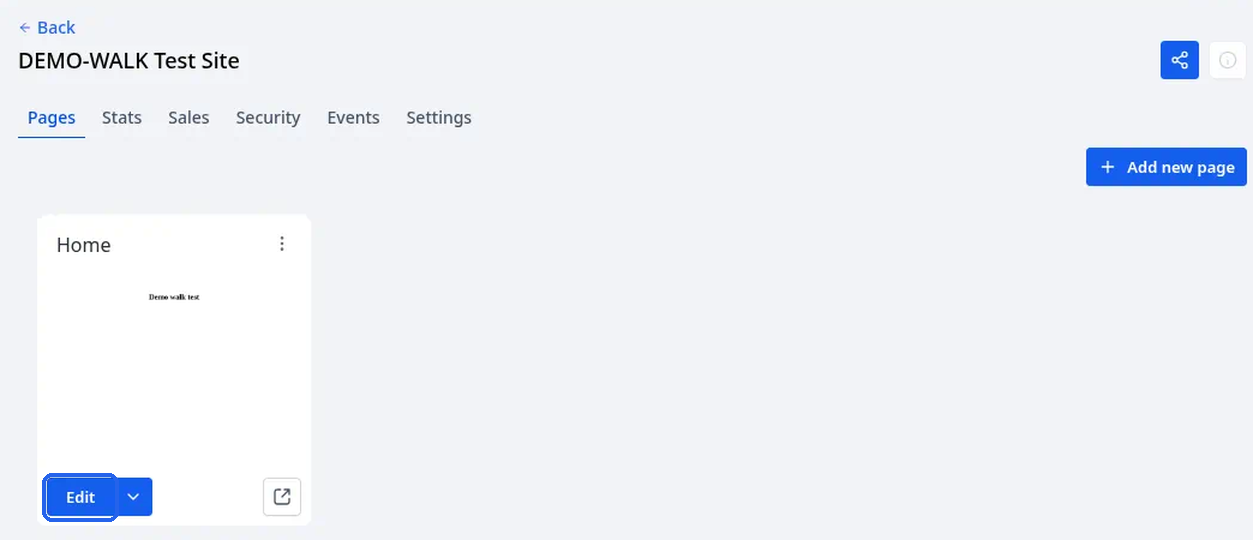
What you should see: the page builder opens, showing your page in the middle of the screen.
Before you change anything, take a moment to find your way around the top of the screen.

What you should see:
- Top bar: Back and Autosave on at the left. While you work, this badge can briefly show Saving… and then Saved just now, because your edits can save on their own before you click the save icon. At the right are a preview (eye) icon, a save (disk) icon and Publish.
- Second row: tool icons, a dropdown showing the name of the page you're editing (for example Home), three device icons (Desktop Mode, Tablet Mode, Mobile Mode), the zoom level (for example 100%), undo and redo arrows, and a clock icon for Version History.
- Third row: the page's web address. If your website isn't on your own domain yet, you'll see a preview address and a Connect Domain button here.
Click the text you want to change and type your new wording.
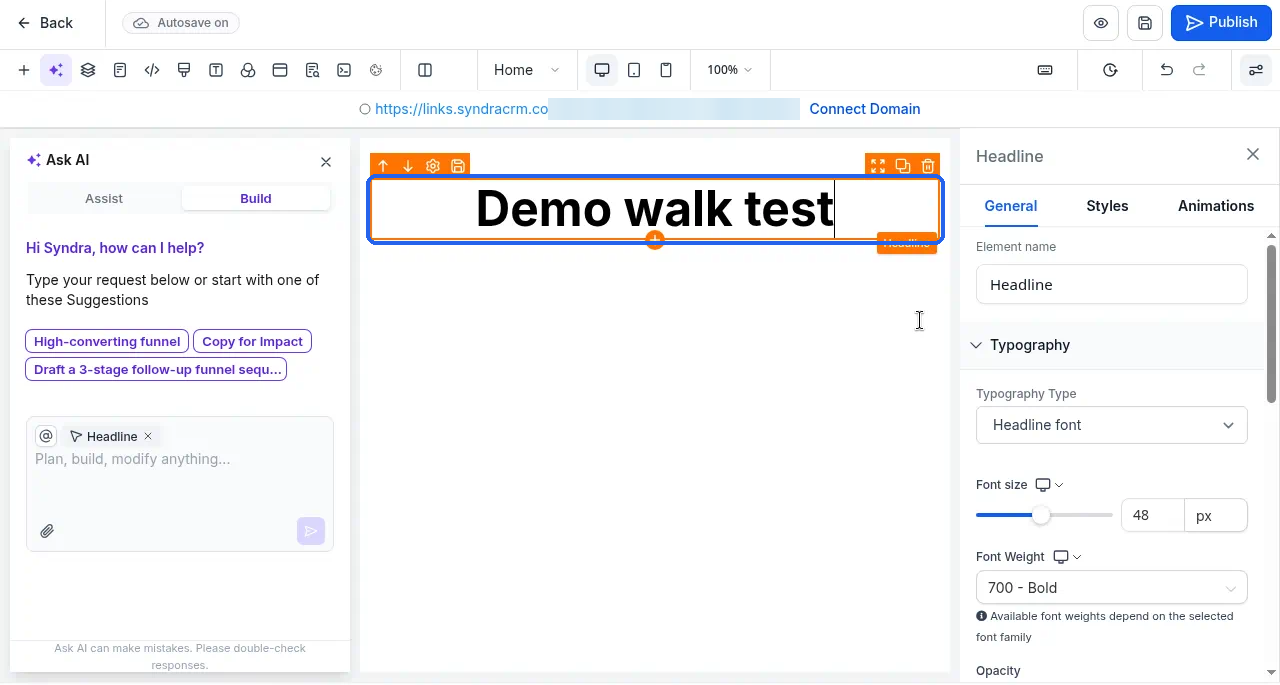
What you should see: the text gets an orange frame with small controls to move, open settings, copy or delete it, and you can type straight into it. A panel opens on the right, named after the kind of text (for example Headline), with General, Styles and Animations tabs. That's where you can change the font, size and weight.
(Optional) To add new text rather than change existing text, click the + at the left of the toolbar to open the Quick Add panel. Under Text, choose Headline, Sub-Headline or Paragraph.
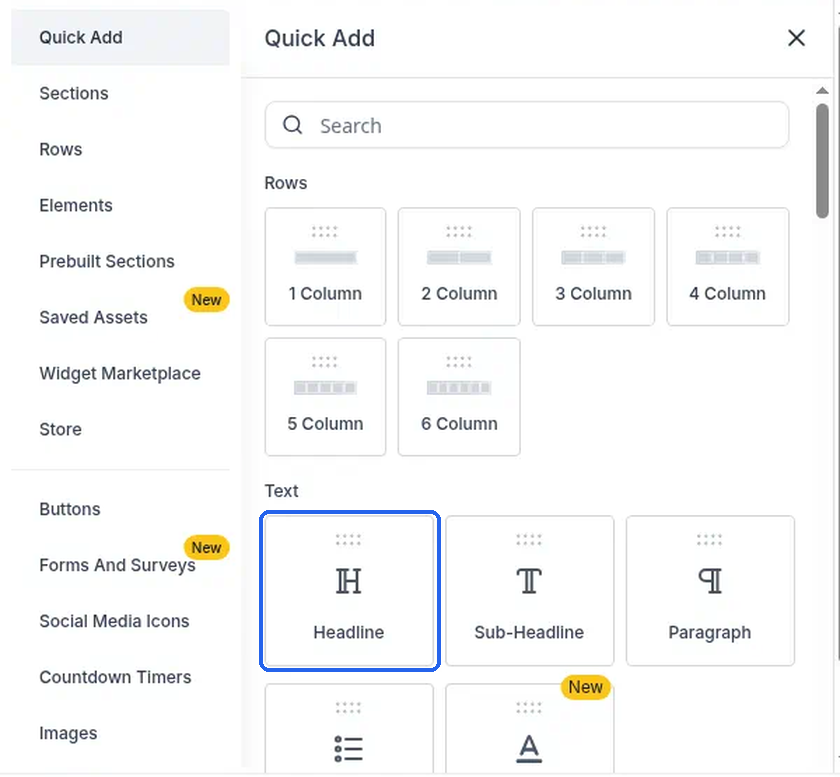
What you should see: the Quick Add panel, with a search box at the top and groups such as Rows and Text. Once your new text is on the page, click it and type, just as in step 6.
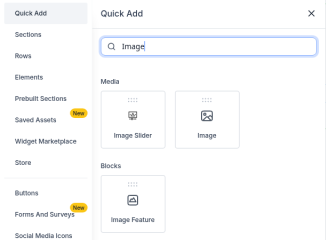
(Optional) To change a photo, click the image on your page. To add a new one, click + to open Quick Add and type Image in the search box. Under Media, choose Image (you'll also see Image Slider, and Image Feature further down). Drag the card onto your page and let go near the edge of the area where you want it. Clicking the card on its own may not add it.
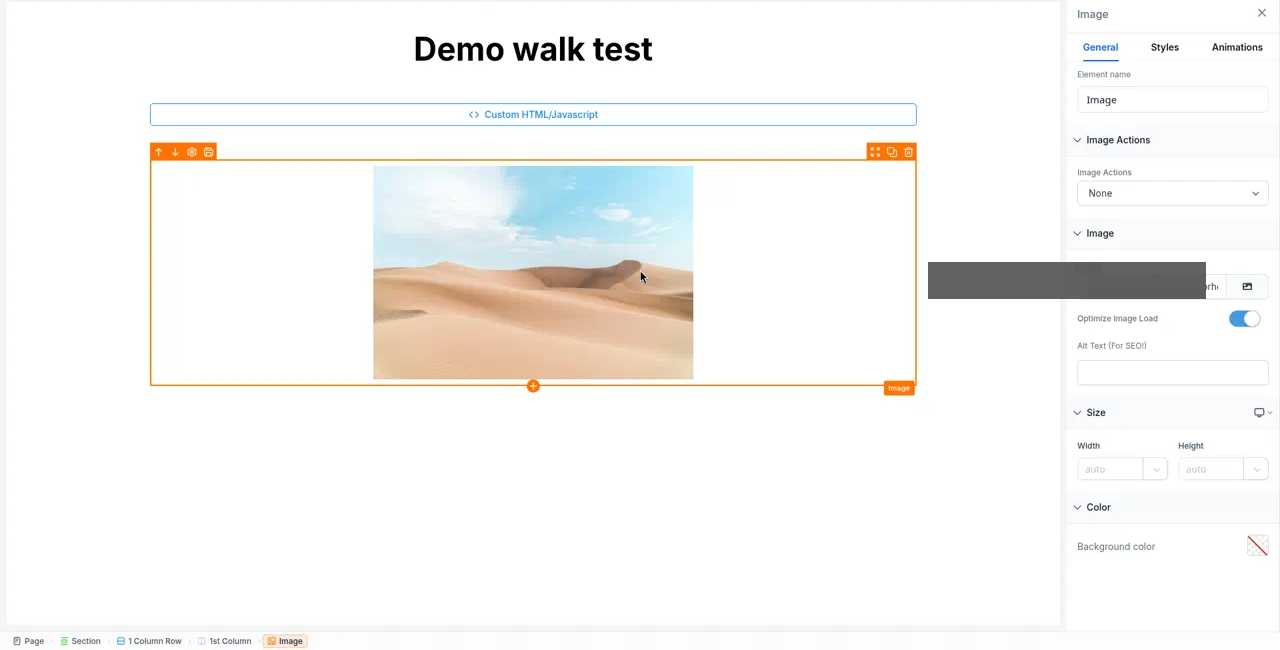
What you should see: the image gets an orange frame, and an Image settings panel opens on the right with General, Styles and Animations tabs. On the General tab you'll find:
- Element name
- Image Actions (set to None to start with)
- Image, a field that shows a default stock image address, with a small picture icon beside it that opens Media Storage (see the next step)
- Optimize Image Load
- Alt Text (For SEO!)
- Size, with a width and a height
- Background color
(Optional) Click the picture icon beside the Image field to open Media Storage. This is your media library.
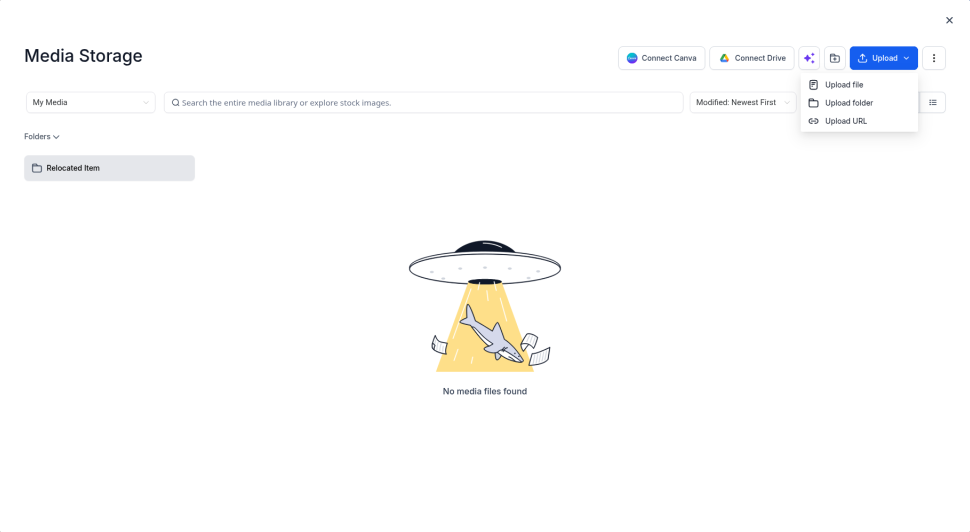
What you should see: a Media Storage window. Across the top are Connect Canva, Connect Drive, a sparkle (AI) button, a new-folder button and an Upload button. Clicking Upload opens a short menu with Upload file, Upload folder and Upload URL. Below that you can:
- search with the box that says "Search the entire media library or explore stock images."
- filter with My Media, sort with Modified: Newest First, use the All filter, and switch between grid and list views
If you haven't added any pictures yet, the window says No media files found. You can open these menus and look around without uploading anything. Close the window with the X at the top right. Uploading a new picture isn't covered in this article.
(Optional) To add a ready-made team section (for example to introduce your groomers), click + to open Quick Add, then click Prebuilt Sections and then Team.
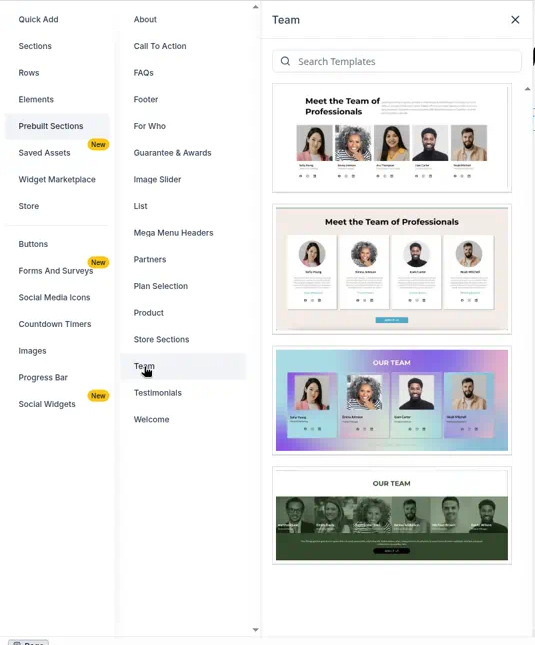
What you should see: four team layouts to choose from. One of them is Meet the Team of Professionals, with four sample names (for example Sofia Young). Each name is a Sub Headline. The photos and names are samples from the template, not real team members, so replace or remove them before you publish. Click a name and type the real name, the same way as in step 6.
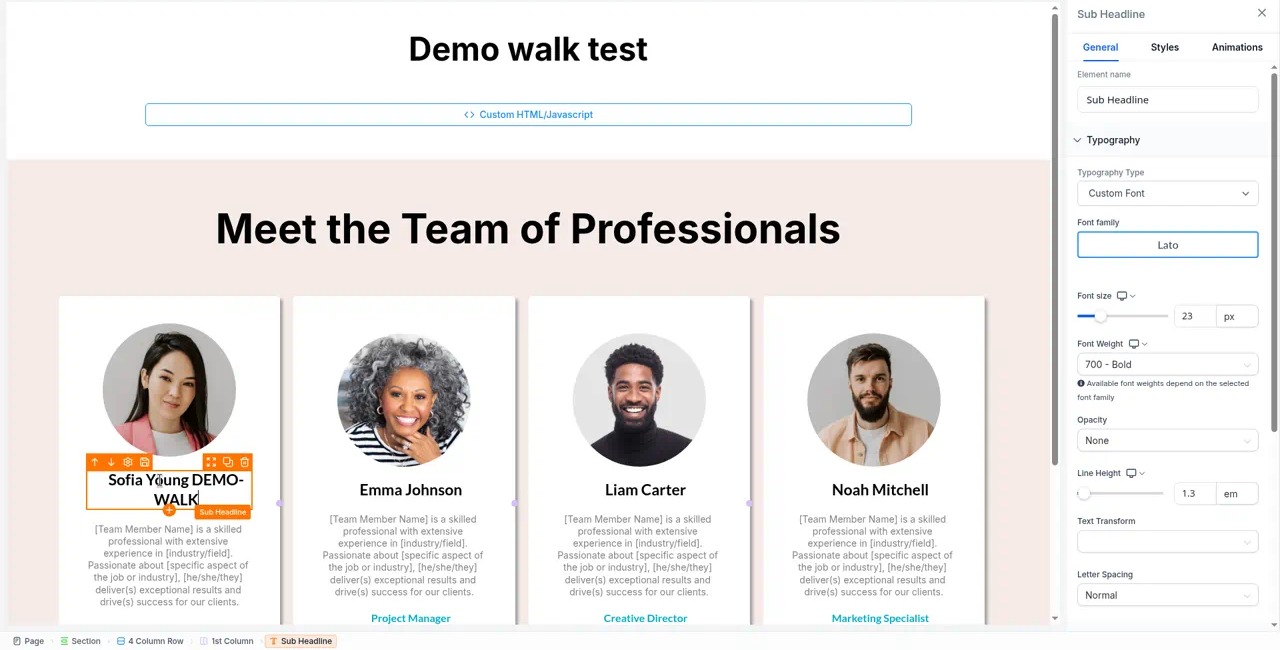
If you only added the section to try out the layout, click the section, use the trash (delete) icon on the section's own toolbar to remove the whole section, then save (step 14).
(Optional) If your page already has a block of custom code on it (for example a booking calendar you added to the page), it shows on the page as Custom HTML/Javascript. Click the block, then click the gear (settings) icon on its toolbar.
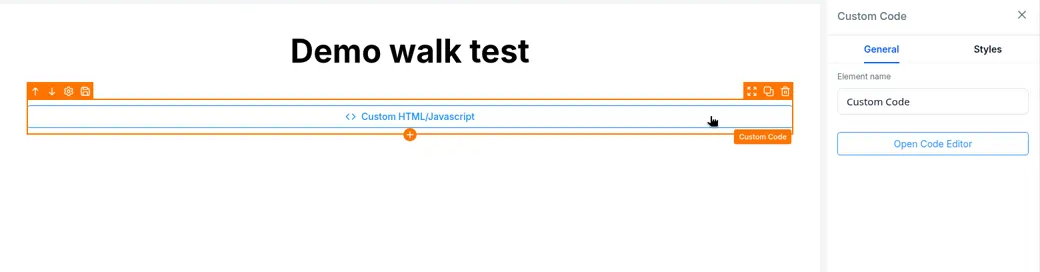
What you should see: a panel titled Custom Code opens on the right, with two tabs:
- General: Element name (it says "Custom Code") and an Open Code Editor button. You don't need to open the code editor just to look at these settings.
- Styles: Margin & Padding (all 0), Container Size (width and height both auto), Visibility (desktop, tablet and mobile all ticked), Custom Class, and CSS Selector with a copy button.
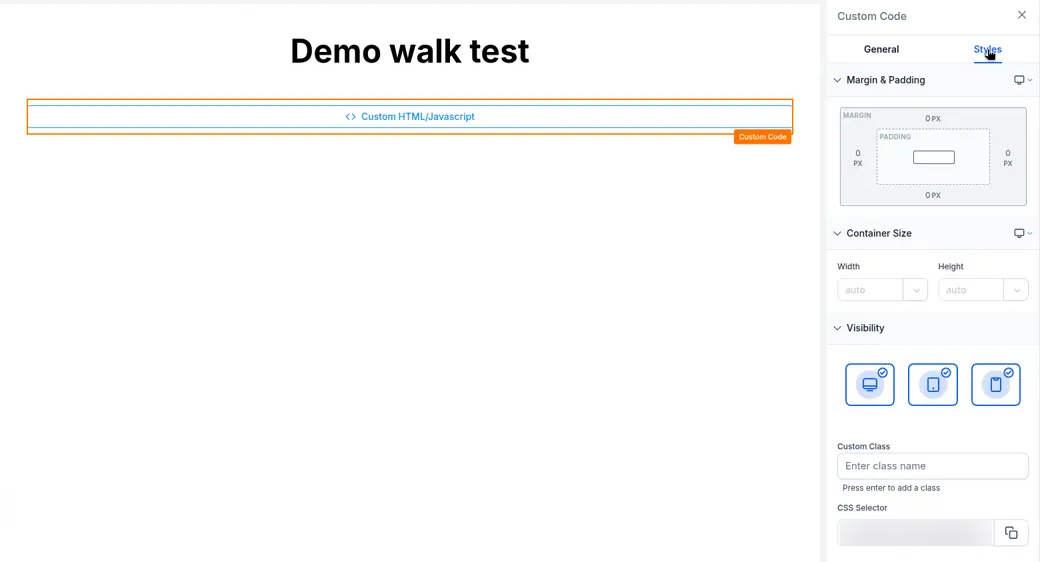
The block's own toolbar has up and down arrows, the gear and a save icon on one side, and expand, duplicate and delete icons on the other. Changing the code itself isn't covered here.
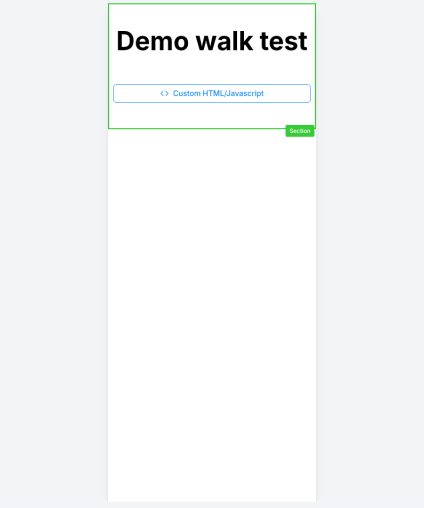
Use the three device icons in the second row to check how your page looks on other screens. Hover over each one to see its name: Desktop Mode (100%), Tablet Mode (810px) and Mobile Mode (390px).

What you should see: when you click Tablet Mode or Mobile Mode, your page narrows to that width and the zoom box shows the width (for example 390px for mobile). Switch between them as often as you like, and click Desktop Mode again when you're done checking.
(Optional) If you make a mistake, use the undo and redo arrows on the right of the second row.

What you should see: undo puts back your previous wording, and redo brings the change back again.
Click the save (disk) icon in the top bar when you want to be sure the page is saved.

What you should see: the badge at the top left changes to Saved just now. Because Autosave on can save your edits on its own, you may see it flip through Saving… and Saved just now while you work, too. It's still worth clicking the save icon when you want a clear checkpoint.
(Optional) To check when your website was last saved, go back to Sites > Websites and look at the Last updated column.

What you should see: the date and time in Last updated changes when you save in the builder. This is for the whole website, not for each page.
(Optional) To see earlier saved versions of the page, click the clock icon (Version History) on the second row of the builder.
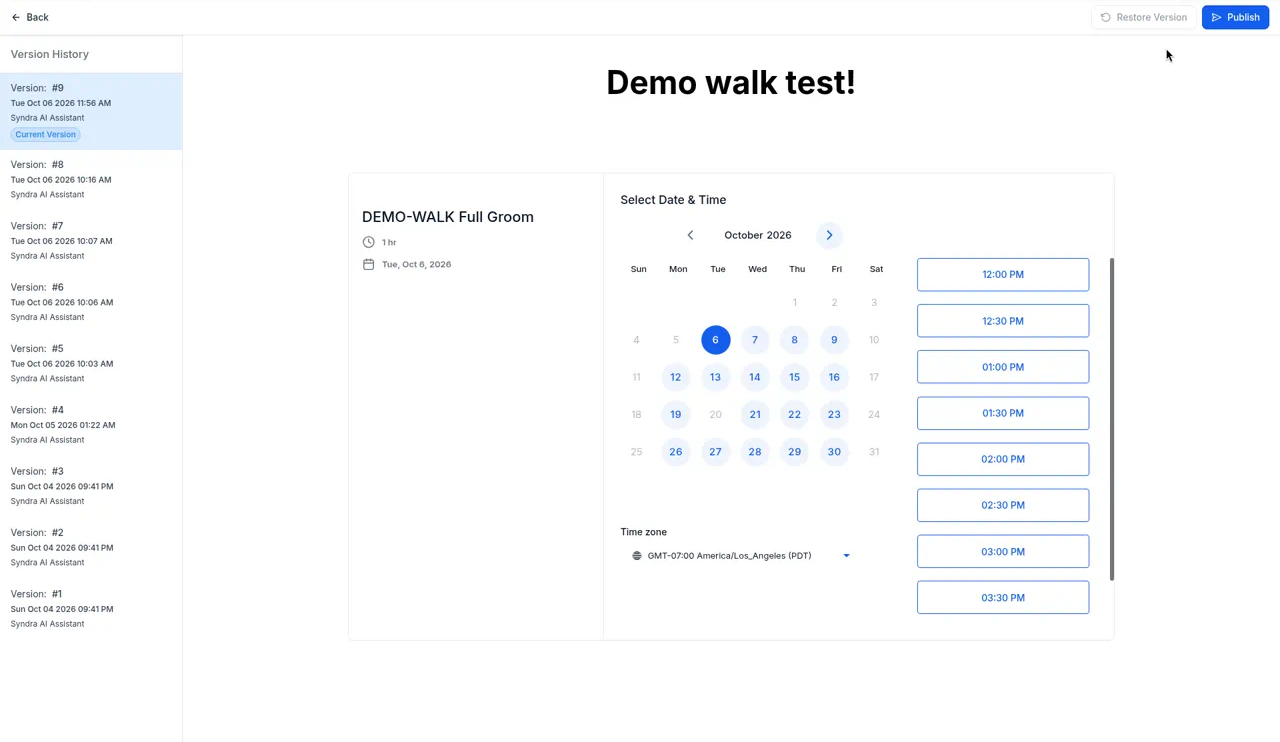
What you should see: a full-screen Version History view. On the left is a list of versions, each showing Version # with a number, a date and time, and a user name. The newest is at the top with a Current Version badge. The selected version shows in the middle of the screen. At the top are Back, Restore Version (greyed out while the current version is selected) and Publish.
You can look through the list without changing anything. Click Back to return to the builder. Restoring an earlier version isn't covered in this article.
Click the preview (eye) icon to see a preview of your page.

What you should see: the preview opens in a new browser tab, showing your page with your change. To keep editing, go back to the builder tab. It stays open.

When you've finished, click Back at the top left of the builder.
What you should see: you're back on your website's Pages tab, and the page's card preview shows your new text. If you only looked around and didn't change anything, Back takes you straight out without asking you anything.
What success looks like
You've finished this part when:
- Your new wording (and any picture or section changes) shows on the page in the builder.
- The badge at the top left of the builder says Saved just now or Autosave on.
- The preview tab shows your page with your change.
- Back on your website's Pages tab (click Back in the builder), the page's card preview shows your new text.
Common mistakes and troubleshooting
You can't find the name of the page you're editing.
It's in the dropdown on the second row of the builder, not in the top bar.
You see Connect Domain instead of your web address.
Your website isn't on your own domain yet, so the builder shows a preview address. Email us if you expected your site to be on your domain already.
You opened the wrong page.
Click Back at the top left of the builder to return to your pages and pick the right card.
You clicked the arrow next to Edit, or the icon at the bottom right of the card.
Those are separate controls. Click the word Edit itself to open the builder.
Your website has no pages ("0 Pages").
Pages are added from the website's Pages tab with + Add new page. If Syndra already has your site set up and it shows 0 pages, email us.
You clicked something in Quick Add and nothing appeared on the page.
Some Quick Add cards, such as Image and Code, may need to be dragged onto the page rather than clicked. Drag the card and let go near the edge of the area where you want it.
Media Storage says "No media files found".
That's what the library shows when it's empty. Close the window with the X if you only wanted to look. Uploading pictures isn't covered in this article.
You added a team section just to try it and want it gone.
Click the section, use the trash icon on the section's own toolbar to delete the whole section, then click the save icon.
The badge keeps changing to "Saving…" on its own.
That's Autosave on at work. Your edits can save before you click the save icon. Click the save icon when you want a clear checkpoint.
You made a mistake while editing.
Use the undo and redo arrows on the second row (step 13). To look back at earlier saved versions, open Version History with the clock icon (step 16) and click Back when you're done.
The preview opened and you can't find the builder.
The preview opens in a new browser tab. The builder is still open in the tab you came from, so switch back to it.
You're ready to publish your changes.
This article stops before Publish. See What happens next below.
What happens next
The Publish button is the blue button at the top right of the builder, next to the save icon. This article stops before you click it.

What happens when you click Publish will be covered in a separate article. Until then, if you'd like help publishing your changes, email [email protected] and we'll help you through it.